Chapter 1 - CHAPTER ONE : PLAYING THE GAME, THE EVENT CHAPTERS, THE THIRTEEN DAYS, + FFXIII INFOS
Chapter 2 - CHAPTER TWO : THE EVENT CHAPTERS, THE THIRTEEN DAYS, FFXIII INFOS
Chapter 3 - CHAPTER THREE : THE EVENT CHAPTERS, THE THIRTEEN DAYS, FFXIII INFOS, BATTLES, BOSS FIGHTS
Battle
FERAL CREATURES : TERRAQUATICS : Breshan Bass
 LIGHTNING FARRON
 SNOW VILLIERS
 OERBA DE VANILLE
 FERAL CREATURES : TERRAQUATICS : Breshan Bass
MONSTERS : BRESHAN BASS [5]
- Start with Aggression using Blitz to quickly take them out
- Use Tireless Charge as needed
Battle
MILITARIZED UNITS : RAZORCLAWS : Pantheron
 LIGHTNING FARRON
 SNOW VILLIERS
 OERBA DE VANILLE
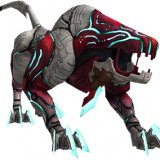 MILITARIZED UNITS : RAZORCLAWS : Pantheron
MONSTERS : PANTHERONS [5}
- Start with Relentless Assault using Blitz to quickly take them all out
Battle
FERAL CREATURES : TERRAQUATICS : Breshan Bass
 LIGHTNING FARRON
 OERBA DE VANILLE
 SAZH KATZROY
 FERAL CREATURES : TERRAQUATICS : Breshan Bass
MONSTERS : BRESHAN BASS [3]
- Stay in Relentless Assault using Blitz the entire fight to quickly take them out
Battle
FERAL CREATURES : TERRAQUATICS : Bloodfang Bass
 LIGHTNING FARRON
 OERBA DE VANILLE
 SAZH KATZROY
 FERAL CREATURES : TERRAQUATICS : Bloodfang Bass
MONSTERS : BLOODFANG BASS [6]
- Stay in Relentless Assault using Blitz for the entire fight to quickly take them out
Battle
SOLDIERS : PSICOM SHOCK TROOPS : PSICOM Tracker
 LIGHTNING FARRON
 OERBA DE VANILLE
 SAZH KATZROY
MONSTERS : PSICOM TRACKERS [2]
- Stay in Relentless Assault to quickly take them out
Battle
MILITARIZED UNITS : DRONES : Watchdrone
 LIGHTNING FARRON
 OERBA DE VANILLE
 SAZH KATZROY
 MILITARIZED UNITS : DRONES : Watchdrone
MONSTERS : WATCHDRONES [3]
- Start with Relentless Assault
- Quickly switch to Tri-Disaster to stagger
- Switch back to Relentless Assault to quickly take them out
- Repeat as necessary
Battle
SOLDIERS : PSICOM HUNTERS : PSICOM Ranger, SOLDIERS : PSICOM SHOCK TROOPS : PSICOM Tracker
 LIGHTNING FARRON
 OERBA DE VANILLE
 SAZH KATZROY
 SOLDIERS : PSICOM HUNTERS : PSICOM Ranger
MONSTERS : PSICOM RANGER [1] | PSICOM TRACKER [2]
- Stay in Relentless Assault for the entire fight, starting first with PSICOM Ranger to quickly take it out
Battle
MILITARIZED UNITS : COGNISPEEDERS : Ciconia Velocycle, MILITARIZED UNITS : DRONES : Watchdrone
 LIGHTNING FARRON
 OERBA DE VANILLE
 SAZH KATZROY
 MILITARIZED UNITS : DRONES : Watchdrone
MONSTERS : CICONIA VELOCYCLE [1] | WATCHDRONE [1]
- Start with Relentless Assault to quickly take out the Watchdrone
- Switch to Tri-Disaster to quickly stagger the Ciconia Velocycle
- Switch to Relentless Assault
- Use Diversity as needed
- Repeat as necessary
Battle
MILITARIZED UNITS : TILTERS : Crusader, SOLDIERS : PSICOM HUNTERS : PSICOM Ranger
 LIGHTNING FARRON
 OERBA DE VANILLE
 SAZH KATZROY
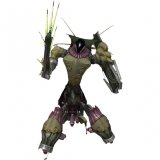 MILITARIZED UNITS : TILTERS : Crusader
 SOLDIERS : PSICOM HUNTERS : PSICOM Ranger
MONSTERS : CRUSADER [1] | PSICOM RANGERS [2]
- Start with Relentless Assault on Crusader
- Switch to Tri-Disaster to stagger Crusader
- Switch to Relentless Assault to quickly take it out
- Use Relentless Assault to quickly take out the PSICOM Rangers
- Use Diversity as needed
Battle
SOLDIERS : PSICOM HUNTERS : PSICOM Ranger, SOLDIERS : PSICOM SHOCK TROOPS : PSICOM Tracker, MILITARIZED UNITS : RAZORCLAWS : Pantheron
 LIGHTNING FARRON
 OERBA DE VANILLE
 SAZH KATZROY
 SOLDIERS : PSICOM HUNTERS : PSICOM Ranger
 MILITARIZED UNITS : RAZORCLAWS : Pantheron
MONSTERS : PSICOM RANGERS [2] | PSICOM TRACKERS [3] | PANTHERONS [2]
- Stay in Relentless Assault entire fight, starting with PSICOM Rangers first
- Take out PSICOM Trackers next, leave Pantherons for last
- Use Diversity as needed
Boss
MILITARIZED UNITS : ANNIHILATORS : Manasvin Warmech
 LIGHTNING FARRON
 SNOW VILLIERS
 OERBA DE VANILLE
 MILITARIZED UNITS : ANNIHILATORS : Manasvin Warmech
BOSS FIGHT : MANASVIN WARMECH
- Start with Solidarity until crystal rain is casted
- Switch to Tri-Disaster to stagger
- Switch to Aggression until stagger bar runs out
- Repeat as necessary
- Use Tireless Charge when needed
Eidolon
EIDOLON : THE TWIN SISTERS OF SHIVA : Stiria & Nix
 SNOW VILLIERS
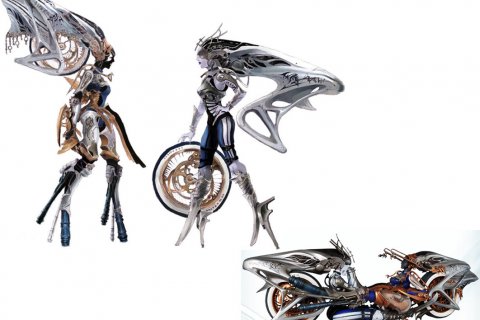 EIDOLON : THE TWIN SISTERS OF SHIVA : Stiria & Nix
EIDOLON : THE TWIN SISTERS OF SHIVA - STIRIA & NIX
- Stay in Sentinel for the entire fight
STIRIA :
- yields to those who amass chain bonuses
- yields to those who defend against and endure attacks
- cannot be provoked
NIX :
- yields to those who amass chain bonuses
- yields to those who defend against and endure attacks
- cannot be provoked
Chapter 4 - CHAPTER FOUR : THE EVENT CHAPTERS, THE THIRTEEN DAYS, FFXIII INFOS, BATTLES, BOSS FIGHTS
Battle
FERAL CREATURES : TERRAQUATICS : Ceratosaur
 LIGHTNING FARRON
 OERBA DE VANILLE
 SAZH KATZROY
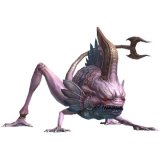 FERAL CREATURES : TERRAQUATICS : Ceratosaur
MONSTERS : CERATOSAURS [5]
- Start with Decimation using Blitz/Ruinga while Haste is being casted
- Switch to Relentless Assault to quickly take them all out
Battle
PULSE AUTOMATA : BOMBS : Bomb
 OERBA DE VANILLE
 SAZH KATZROY
 PULSE AUTOMATA : BOMBS : Bomb
MONSTERS : BOMB [1-3]
- Try for Pre-emptive Strike if possible
- Stay in Slash & Burn for trhe entire fight
Battle
FERAL CREATURES : SPOOKS : Gremlin
 OERBA DE VANILLE
 SAZH KATZROY
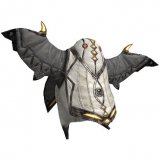 FERAL CREATURES : SPOOKS : Gremlin
MONSTERS : GREMLIN [2-4]
- Stay in Slash & Burn for the entire fight to quickly take them out
Battle
PULSE AUTOMATA : PULSEWORK SOLDIERS : Pulsework Soldier, PULSE AUTOMATA : BOMBS : Bomb
 OERBA DE VANILLE
 SAZH KATZROY
 PULSE AUTOMATA : PULSEWORK SOLDIERS : Pulsework Soldier
 PULSE AUTOMATA : BOMBS : Bomb
MONSTERS : Pulsework Soldier {1} | Bombs [3]
- Start with Slash & Burn using Blitz to quickly take out the three bombs first
- Switch to Divide and Conquer to cast at least two debuffs on Pulsework Soldier
- Switch to Dualcasting to stagger quickly
- Switch to Slash & Burn to quickly take it out
- Use War & Peace as needed
Battle
PULSE AUTOMATA : PULSEWORK SOLDIERS : Pulsework Soldier, PULSE AUTOMATA : BOMBS : Bomb
 OERBA DE VANILLE
 SAZH KATZROY
 PULSE AUTOMATA : PULSEWORK SOLDIERS : Pulsework Soldier
 PULSE AUTOMATA : BOMBS : Bomb
MONSTERS : Pulsework Soldiers [2] | Bombs [2]
- Start with Slash & Burn on last Bomb
- Quickly take out the Bombs then switch to Divide & Conquer to cast debuffs on Pulsework Soldier
- Switch to Dualcasting when at least two debuffs are casted
- Repeat as necessary until taken out completely
- Use War & Peace as needed
Eidolon
EIDOLON : ODIN
 LIGHTNING FARRON
 HOPE ESTHEIM
 EIDOLON : ODIN
EIDOLON : ODIN
- Start off with Symbiosis with healing Hope while he casts two buffs
- Switch to Double Dose to keep health topped up
- Switch back to Symbiosis to finish casting the two buffs
- Switch to Dualcasting until Odin focuses on Hope
- Switch to Yin & Yang with focusing healing on Hope and Lightning 2nd
ODIN :
- yields to those who amass chain bonuses
- yields to those who heal the wounded
Boss
OTHERS : FAL'CIE : Dahaka
 LIGHTNING FARRON
 OERBA DE VANILLE
 SAZH KATZROY
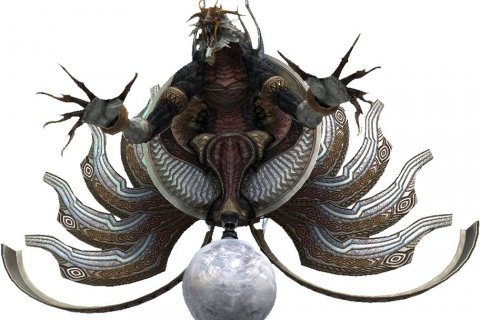 OTHERS : FAL'CIE : Dahaka
BOSS : DAHAKA
- Use Fortisol and Aegisol before battle
- Switch to Smart Bomb until staggered
- Switch to Aggression when staggered
- Repeat as needed
----------------------------------------------------------------------------------------------------------------------------------------------------------------------------------------------------------------------------------------------------------------------
NOTES :
- Executes powerful magic attacks
- Capable of inflicting Imperil
- Capable of bestowing Faith
- Susceptible to Imperil
Chapter 5 - CHAPTER FIVE : THE EVENT CHAPERS, THE THIRTEEN DAYS, FFXIII INFOS, BATTLES, BOSS FIGHTS
Battle
MILITARIZED UNITS : LEECHES : Frag Leech
 LIGHTNING FARRON
 HOPE ESTHEIM
 MILITARIZED UNITS : LEECHES : Frag Leech
MONSTERS : FRAG LEECH [5]
- Stay in Slash & Burn for the entire fight using Fira to quickly take them out
Battle
MILITARIZED UNITS : VESPIDS : Vespid, MILITARIZED UNITS : RAZORCLAWS : Thexteron
 LIGHTNING FARRON
 HOPE ESTHEIM
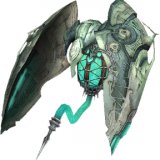 MILITARIZED UNITS : VESPIDS : Vespid
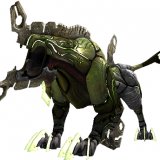 MILITARIZED UNITS : RAZORCLAWS : Thexteron
MONSTERS : VESPID [1] | THEXTERON [2]
- Start with Slash & Burn to quickly take out the Thexterons
- Switch to Dualcasting to quickly stagger the Vespid
- Switch back to Slash & Burn to quickly finish off the Vespid
Battle
FERAL CREATURES : BEASTS : Silver Lobo
 LIGHTNING FARRON
 HOPE ESTHEIM
 FERAL CREATURES : BEASTS : Silver Lobo
MONSTERS : SILVER LOBO [1-3]
- Start with Slash & Burn
- switch to Dualcasting to quickly stagger
- switch back to Slash & Burn to quickly take it out
Battle
FERAL CREATURES : NUDIBRANCHS : Crawler
 LIGHTNING FARRON
 HOPE ESTHEIM
 FERAL CREATURES : NUDIBRANCHS : Crawler
MONSTERS : CRAWLERS [5]
- try for Pre-emptive Strike
- Stay in Slash & Burn using Fira to quickly take them out
Battle
FERAL CREATURES : NUDIBRANCHS : Crawler
 LIGHTNING FARRON
 HOPE ESTHEIM
 FERAL CREATURES : NUDIBRANCHS : Crawler
MONSTERS : Crawlers [4-5]
- Try for Preemptive Strike when Lightning is leader
- Stay in Slash & Burn using Bltiz to quickly take them out
Battle
SOLIDERS : CORPS GUNMEN : Corps Marksman, SOLIDERS : CORPS FOOTMEN : Corps Watchman
 LIGHTNING FARRON
 HOPE ESTHEIM
 SOLIDERS : CORPS GUNMEN : Corps Marksman
 SOLIDERS : CORPS FOOTMEN : Corps Watchman
MONSTERS : CORPS MARKSMAN [1] | CORPS WATCHMAN [2]
- Start with Slash & Burn to quickly take out Corps Marksman
- Switch to Dualcasting to quickly stagger Corps Watchman
- Switch to Slash & Burn to quickly take out Corps Watch man
- Repeat as necessary
- Use War & Peace as needed
Battle
MILITARIZED UNITS : COGNISPEEDERS : Milvus Velocycle
 LIGHTNING FARRON
 HOPE ESTHEIM
 MILITARIZED UNITS : COGNISPEEDERS : Milvus Velocycle
MONSTERS : MILVUS VELOCYCLE [1]
- Start with Slash & Burn
- Switch to Dualcasting to stagger
- Switch to Slash & Burn until stagger bar runs out
- Switch to Dualcasting when stagger bar runs out
- Use War & Peace if needed
Battle
MILITARIZED UNITS : COGNISPEEDERS : Milvus Velocycle, SOLIDERS : CORPS GUNMEN : Corps Marksman
 LIGHTNING FARRON
 HOPE ESTHEIM
 MILITARIZED UNITS : COGNISPEEDERS : Milvus Velocycle
 SOLIDERS : CORPS GUNMEN : Corps Marksman
MONSTERS : MILUS VELOCYLE [1] | CORPS MARKSMAN [2]
- Start with Slash & Burn to quickly take out the Corps Marksmens
- Switch to Dualcasting to stagger the Milvus Velocycle
- Switch to Slash & Burn to quickly take it out
- Use War & Peace when needed
Boss
MILITARIZED UNITS : ANNIHILATORS : Aster Protoflorian
 LIGHTNING FARRON
 HOPE ESTHEIM
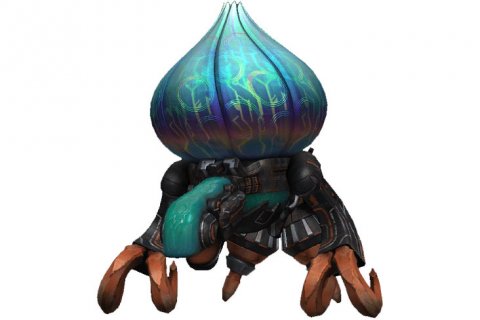 MILITARIZED UNITS : ANNIHILATORS : Aster Protoflorian
BOSS FIGHT : ASTER PROTOFLORIAN
- Cast Fortisol & Aegisol before the fight
- Start with Slash & Burn
- Switch to Dualcasting to stagger
- Switch to Slash & Burn until stagger bar runs out
- Switch to Dualcasting to stagger again
- Repeat as necessary
- Use War & Peace when needed
ASTER PROTOFLORIAN :
- can alter own elemental weaknesses
- delivers devastating physical attacks
Chapter 6 - CHAPTER SIX : THE EVENT CHAPTERS, THE THIRTEEN DAYS, FFXIII INFOS, BATTLES, BOSS FIGHTS
Battle
FERAL CREATURES : FLAN : Flandragora, FERAL CREATURES : TERRAQUATICS : Hedge Frog
 OERBA DE VANILLE
 SAZH KATZROY
 FERAL CREATURES : FLAN : Flandragora
 FERAL CREATURES : TERRAQUATICS : Hedge Frog
MONSTERS : Flandragora [1] | Hedge Frog [2]
- Try for Preemptive Strike
- Start with Slash & Burn using Fira to quickly take out the Hedge Frogs
- Switch to Undermine to cast debuff until staggered
- Switch to Slash & Burn to quickly take out Flandragora
Battle
FERAL CREATURES : TERRAQUATICS : Hedge Frog
 OERBA DE VANILLE
 SAZH KATZROY
 FERAL CREATURES : TERRAQUATICS : Hedge Frog
MONSTERS : HEDGE FROG [3-6]
- Stay in Slash & Burn using Fira to quickly take them out
Battle
FERAL CREATURES : SPOOKS : Gremlin
 OERBA DE VANILLE
 SAZH KATZROY
 FERAL CREATURES : SPOOKS : Gremlin
MONSTERS : GREMLINS [6]
- Stay in Slash & Burn using Fira to quickly take them out
Battle
FERAL CREATURES : TERRAQUATICS : Mud Frog, FERAL CREATURES : TERRAQUATICS : Hedge Frog
 OERBA DE VANILLE
 SAZH KATZROY
 FERAL CREATURES : TERRAQUATICS : Mud Frog
 FERAL CREATURES : TERRAQUATICS : Hedge Frog
MONSTERS : MUD FROG [1] | HEDGE FROG [5]
- Start with Slash & Burn using Fira on Mud Frog
- Switch to Dualcasting using Fire to quickly stagger Mud Frog
- Switch back to Slash & Burn using Fira to quickly take out the Mud Frog & Hedge Frogs
Battle
FERAL CREATURES : TERRAQUATICS : Mud Frog, FERAL CREATURES : TERRAQUATICS : Hedge Frog
 OERBA DE VANILLE
 SAZH KATZROY
 FERAL CREATURES : TERRAQUATICS : Mud Frog
 FERAL CREATURES : TERRAQUATICS : Hedge Frog
MONSTERS : MUD FROGS [3] | HEDGE FROGS [2-3]
- Use Deceptisol before fight
- Start with Slash & Burn using Fira on middle Mud Frog
- Repeat as necessary until at least 2 Mud Frogs taken out
- Switch to Dualcasting using Fire to quickly take out last Mud Frog
- Switch back to Slash & Burn using Fira to quickly take out Hedge Frogs
- Use War & Peace as needed
Battle
FERAL CREATURES : ARMADILLONS : Scalebeast, FERAL CREATURES : SPOOKS : Gremlin
 OERBA DE VANILLE
 SAZH KATZROY
 FERAL CREATURES : ARMADILLONS : Scalebeast
 FERAL CREATURES : SPOOKS : Gremlin
MONSTERS : SCALEBEAST [1] | GREMLIN [3]
- Use Deceptisol / try for Preemptive Strike first before the fight
- Start with Undermine to quickly stagger and cast 3 debuffs on Scalebeast first
- Switch to Slash & Burn to quickly take out the Gremlins
- Switch between Slash & Burn with Dualcasting to stagger Scalebeast
- Switch to Slash & Burn when Scalebeast staggered
- Repeat as necessary
- Use War & Peace as needed
Battle
FERAL CREATURES : SPOOKS : Garchimacera, FERAL CREATURES : SPOOKS : Gremlin
 OERBA DE VANILLE
 SAZH KATZROY
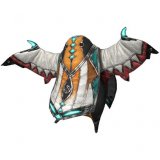 FERAL CREATURES : SPOOKS : Garchimacera
 FERAL CREATURES : SPOOKS : Gremlin
MONSTERS : GARCHIMACERA [1-3] | GREMLIN [5]
- Use Deceptisol before the fight
- Stay with Slash & Burn using Fira on middle Garchimacera first to quickly stagger take out Garchimaceras
Battle
FERAL CREATURES : WYVERN : Wyvern
 OERBA DE VANILLE
 SAZH KATZROY
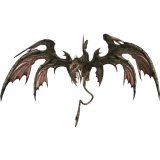 FERAL CREATURES : WYVERN : Wyvern
MONSTERS : WYVERN [1]
- Start with Undermine to cast debuffs
- Switch to Slash & Burn once staggered or Dualcasting to stagger
- Repeat as necessary
- Use War & Peace as needed
Battle
FERAL CREATURES : FLAN : Flandragora
 OERBA DE VANILLE
 SAZH KATZROY
 FERAL CREATURES : FLAN : Flandragora
MONSTERS : FLANDRAGORA [2 - 4]
- Try for Preemptive Strike
- Start with Slash & Burn using Fira until those staggered taken out
- Switch to Dualcasting to stagger last 2 Flandragoras
- Switch back to Slash & Burn using Fira/Fire to quickly take them out
Battle
FERAL CREATURES : TERRAQUATICS : Mud Frog, FERAL CREATURES : TERRAQUATICS : Hedge Frog
 OERBA DE VANILLE
 SAZH KATZROY
 FERAL CREATURES : TERRAQUATICS : Mud Frog
 FERAL CREATURES : TERRAQUATICS : Hedge Frog
MONSTERS : MUD FROG [2] | HEDGE FROG [1-6]
- Use Deceptisol to first before the fight
- Start with Slash & Burn using Fira on Mud Frogs
- Switch to Dualcasting to quickly stagger
- Switch back to Slash & Burn using Fira to quickly take it out
- Repeat as necessary until both Mud Frogs are taken out
- Stay in Slash & Burn using Fira to quickly take out the Hedge Frogs
- Use War & Peace as needed
Battle
FERAL CREATURES : TERRAQUATICS : Mud Frog, FERAL CREATURES : TERRAQUATICS : Hedge Frog
 OERBA DE VANILLE
 SAZH KATZROY
 FERAL CREATURES : TERRAQUATICS : Mud Frog
 FERAL CREATURES : TERRAQUATICS : Hedge Frog
MONSTERS : MUD FROGS [5] | HEDGE FROGS [3]
- Use Deceptisol before fight
- Start with Slash & Burn on 2nd Mud Frog using Fira
- Stay in Slash & Burn using Fira on all staggered Mud Frogs
- Switch to Dualcasting using Fire when stagger bar runs out on last Mud Frog
- Switch back to Slash & Burn using Fira to quickly take out Hedge Frogs
Battle
FERAL CREATURES : WYVERN : Wyvern, FERAL CREATURES : SPOOKS : Garchimacera
 OERBA DE VANILLE
 SAZH KATZROY
 FERAL CREATURES : WYVERN : Wyvern
 FERAL CREATURES : SPOOKS : Garchimacera
MONSTERS : WYVERN [1] | GARCHIMACERA [2]
- Start with Undermine on Garchimacera
- Switch to Slash & Burn to quickly take them out
- Repeat as necessary until both Garchimaceras are taken out
- Switch to Undermine to cast three debuffs on Wyvern
- Switch to Dualcasting until staggered
- Switch to Slash & Burn
- Use War & Peace to keep health topped up at all times
Battle
FERAL CREATURES : TERRAQUATICS : Mud Frog
 OERBA DE VANILLE
 SAZH KATZROY
 FERAL CREATURES : TERRAQUATICS : Mud Frog
MONSTERS : MUD FROG [5]
- Start with Slash & Burn using Quake technique to stagger
- Use Fira to quickly take them out
- Repeat as necessary
- Use War & Peace as needed
Boss
FERAL CREATURES : WOODWRAITHS : Enki + Enlil
 OERBA DE VANILLE
 SAZH KATZROY
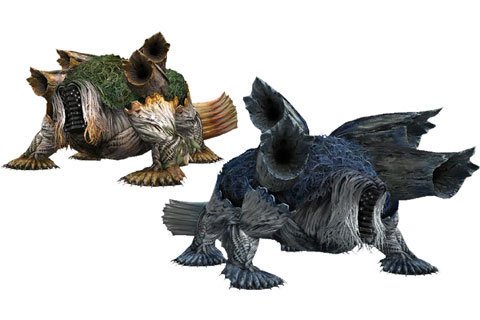 FERAL CREATURES : WOODWRAITHS : Enki + Enlil
BOSS MONSTERS : ENLIL + ENKI
- Start with Undermine to cast debuffs on Enlil
- Switch to Dualcasting to stagger
- Switch to Slash & Burn until Stagger bar runs out
- Repeat as necessary
- Repeat on Enki
- Use War & Peace as needed
ENLIL :
- susceptible to Poison
- employs powerful lightning-based attacks
- capable of inflicting Deprotect
ENKI :
- susceptible to Poison
- employs powerful water-based attacks
- capable of inflicting Deprotect
Chapter 7 - CHAPTER SEVEN : THE EVENT CHAPTERS, THE THIRTEEN DAYS, FFXII INFOS, BATTLES, BOSS FIGHTS
Battle
MILITARIZED UNITS : ARMADONS : Lucidon
 LIGHTNING FARRON
 HOPE ESTHEIM
 MILITARIZED UNITS : ARMADONS : Lucidon
MONSTERS : LUCIDON [1]
- Start with Supersoldier until at least 1 buffs are casted
- Switch to Dualcasting and stay until staggered quickly
- Switch to Slash & Burn when staggered
- Use War & Peace only when absolutely necessary
Battle
MILITARIZED UNITS : FLANS : Flanitor
 LIGHTNING FARRON
 HOPE ESTHEIM
 MILITARIZED UNITS : FLANS : Flanitor
MONSTERS : FLANITOR [2]
- Stay in Slash & Burn for the entire fight using Blitz to quickly take them out
Battle
MILITARIZED UNITS : ARMADONS : Lucidon , MILITARIZED UNITS : FLANS : Flanitor
 LIGHTNING FARRON
 HOPE ESTHEIM
 MILITARIZED UNITS : ARMADONS : Lucidon
 MILITARIZED UNITS : FLANS : Flanitor
MONSTERS : LUCIDON [1] | FLANITOR [1]
- Start with Supersoldier using auto attack until Flanitor is taken out
- Switch to Techniques to Summon Odin
- Switch back to Slash & Burn for 1 round on Lucidon
- Switch to Dualcasting to quickly stagger
- Switch back to Slash & Burn to quickly take it out
- Use War & Peace only when absolutely necessary
Battle
MILITARIZED UNITS : COGNISPEEDERS : Falco Velocycle
 LIGHTNING FARRON
 HOPE ESTHEIM
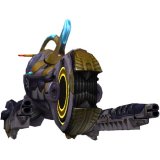 MILITARIZED UNITS : COGNISPEEDERS : Falco Velocycle
MONSTERS : FALCO VELO CYCLE [1]
- Cast Fortisol & Aegisol before battle
- Start with Slash & Burn
- Switch to Dualcasting to stagger
- Switch back to Slash & Burn to quickly take it out
Battle
SOLDIERS : PSICOM ARTILLERY : PSICOM Bombardier, SOLDIERS : CORPS FOOTMENS : Corps Pacifex, SOLDIERS : CORPS GUNMENS : Corps Tranquifex
 SNOW VILLIERS
 HOPE ESTHEIM
 SOLDIERS : PSICOM ARTILLERY : PSICOM Bombardier
 SOLDIERS : CORPS FOOTMENS : Corps Pacifex
 SOLDIERS : CORPS GUNMENS : Corps Tranquifex
MONSTERS : PSICOM BOMBARDIER [1] | CORPS PACIFEX [2] | CORPS TRANQUIFEX [2]
- Start with Slash & Burn to take out Pacifex and Tranquifex
- Switch to Dualcasting to stagger them both
- Switch back to Slash & Burn on PSICOM Bombardier for last
- Switch to Dualcasting to stagger
- Switch back to Slash & Burn to quickly take out PSICOM Bombardier
- Use Lifeguard when needed
Battle
SOLDIERS : CORPS FOOTMENS : Corps Pacifex, SOLDIERS : CORPS GUNMENS : Corps Tranquifex
 LIGHTNING FARRON
 MYSTERIOUS WOMAN : OERBA YUN FANG
 SOLDIERS : CORPS FOOTMENS : Corps Pacifex
 SOLDIERS : CORPS GUNMENS : Corps Tranquifex
MONSTERS : CORPS PACIFEX [2] | CORPS TRANQUIFEX [2]
- Stay in Slash & Burn the entire fight
Battle
MILITARIZED UNITS : TILTERS : Orion
 LIGHTNING FARRON
 MYSTERIOUS WOMAN : OERBA YUN FANG
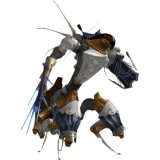 MILITARIZED UNITS : TILTERS : Orion
MONSTERS : ORION [1]
- Start with Undermine to cast debuff slow
- Switch to Dualcasting to stagger
- Switch to Slash & Burn to quickly finish it off
Battle
SOLDIERS : PSICOM AIRBORNE : PSICOM Aerial Sniper
 SNOW VILLIERS
 HOPE ESTHEIM
 SOLDIERS : PSICOM AIRBORNE : PSICOM Aerial Sniper
MONSTERS : PSICOM AERIAL SNIPER [3]
- Start with Slash & Burn on middle Aerial Sniper
- Switch to Dualcasting to quickly stagger
- Switch back to Slash & Burn to quickly take it out
- Switch to Lifeguard to heal quickly
- Switch to Slash & Burn
- Switch to Dualcasting to stagger quickly
- Switch back to Slash & Burn to quickly take it out
- Repeat as needed
Battle
MILITARIZED UNITS : COGNISPEEDERS : Falco Velocycle, SOLDIERS : PSICOM AIRBORNE : PSICOM Aerial Sniper
 SNOW VILLIERS
 HOPE ESTHEIM
 MILITARIZED UNITS : COGNISPEEDERS : Falco Velocycle
 SOLDIERS : PSICOM AIRBORNE : PSICOM Aerial Sniper
MONSTERS : FALCO VELOCYCLE [1] | PSICOM AERIAL SNIPER [2]
- Cast Deceptisol before the fight
- Start with Slash & Burn on Falco Velocycle
- Switch to Dualcasting to stagger if needed
- Switch back to Slash & Burn to quickly take out Falco Velocycle
- Repeat as needed on the 2 PSICOM Aerial Snipers
- Use Lifeguard as needed
Battle
MILITARIZED UNITS : BEHEMOTHS : Lodestar Behemoth, SOLDIERS : PSICOM ARTILLERY : PSICOM Bombardier
 LIGHTNING FARRON
 MYSTERIOUS WOMAN : OERBA YUN FANG
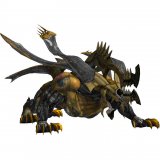 MILITARIZED UNITS : BEHEMOTHS : Lodestar Behemoth
 SOLDIERS : PSICOM ARTILLERY : PSICOM Bombardier
MONSTERS : LODESTAR BEHEMOTH [1] | PSICOM BOMBOARDIER [1]
- Use Deceptisol to stagger PSICOM Bomboardier
- Start with Slash & Burn to stagger PSICOM Bomboardier
- Switch to Double Trouble to quickly take out PSICOM Bomboardier
- Switch to Undermine to cast Slow onto Lodestar Behemoth
- Switch to Slash & Burn to make stagger bar grow
- Use Lifeguard when needed
Boss
MILITARIZED UNITS : ANNIHILATORS : Ushumgal Subjugator
 SNOW VILLIERS
 HOPE ESTHEIM
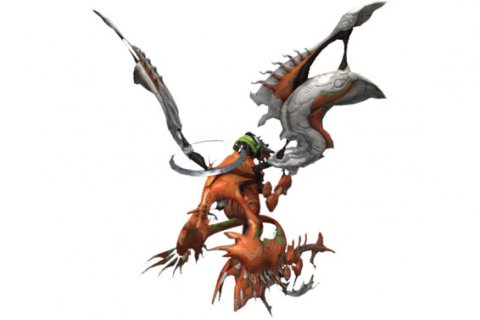 MILITARIZED UNITS : ANNIHILATORS : Ushumgal Subjugator
BOSS FIGHT : USHUMGAL SUBJUGATOR
- Start with Building Blocks until Steelguard is finished
- Cast Libra onto Ushumgal Subjugator for fighting infos
- Alternate between Slash & Burn with Dualcasting to keep stagger bar growing
- Use Lifeguard & Building Blocks as needed
USHUMGAL SUBJUGATOR :
- employs powerful fire-based attacks
- delivers devastating attacks
- vulnerable to lightning damage
Boss
MILITARIZED UNITS : ANNIHILATORS : Ushumgal Subjugator
 LIGHTNING FARRON
 HOPE ESTHEIM
 MYSTERIOUS WOMAN : OERBA YUN FANG
 MILITARIZED UNITS : ANNIHILATORS : Ushumgal Subjugator
BOSS FIGHT : USHUMGAL SUBJUGATOR
- Start with Undermine to cast Slow onto Ushumgal Subjugator
- Switch to Relentless Assault to stagger
- Switch to Aggression when staggered
- Use Combat Clinic when needed
USHUMGAL SUBJUGATOR :
- delivers devastating physical attacks
- susceptible to Slow
- vulnerable to lightning damage
Boss
MILITARIZED UNITS : ARMATURES : Havoc Sky Tank, Starboards, Portsides
 LIGHTNING FARRON
 HOPE ESTHEIM
 MYSTERIOUS WOMAN : OERBA YUN FANG
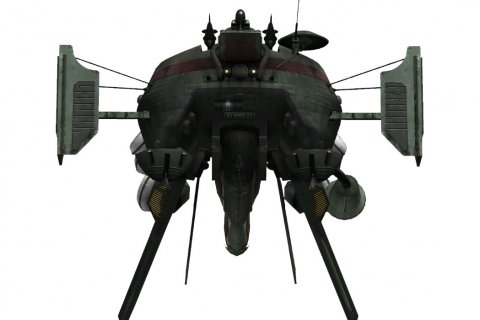 MILITARIZED UNITS : ARMATURES : Havoc Sky Tank, Starboards, Portsides
MONSTER BOSS : HAVOC SKYTANK | STARBOARDS | PORTSIDES
- Start with Protection to cast at least two buffs on all characters
- Switch to Relentless Assualt to stagger either Starboard or Portside
- Switch to Aggression when staggered
- Switch to Protection recast at least two buffs on all characters when expired
- Use Combat Clinic / Tireless Charge as needed
HAVOC SKYTANK :
- cannot be attacked at close range
- delivers devastating physical attacks
- immune to all status ailments
- can be attacked in multiple locations
STARBOARD & PORTSIDES :
- cannot be attacked at close range
- delivers devastating physical attacks
- immune to all status ailments
- coordinates attacks against a single target
Chapter 8 - CHAPTER EIGHT : THE EVENT CHAPTERS : THE THIRTEEN DAYS, FFXIII INFOS, BATTLES, BOSS FIGHTS
Battle
SOLDIERS : CORPS GUNMEN : Corps Gunner
 OERBA DE VANILLE
 SAZH KATZROY
 SOLDIERS : CORPS GUNMEN : Corps Gunner
MONSTERS : CORPS GUNNERS [6]
- Use Blitz on all of them except for the last one
- Use attack on the last one to quickly take it out
Battle
MILITARIZED UNITS : ZWERG DROIDS : Zwerg Metrodroid
 OERBA DE VANILLE
 SAZH KATZROY
 MILITARIZED UNITS : ZWERG DROIDS : Zwerg Metrodroid
MONSTERS : ZWERG METRODROID [2]
- Stay in Slash & Burn for the entire fight
- Use Blitz & Attack to quickly take them out
Battle
MILITARIZED UNITS : ZWERG DROIDS : Zwerg Metrodroid, SOLDIERS : CORPS GUNMEN : Corps Gunner
 OERBA DE VANILLE
 SAZH KATZROY
 MILITARIZED UNITS : ZWERG DROIDS : Zwerg Metrodroid
 SOLDIERS : CORPS GUNMEN : Corps Gunner
MONSTERS : ZWERG METRODROIDS [2] | CORPS GUNNERS [3]
- Start with Blitz to quickly take out the Corps Gunners
- Use Blitz to quickly take out the Zwerg Metrodroids
Boss
MILITARIZED UNITS : ARMATURES : Midlight Reaper
 OERBA DE VANILLE
 SAZH KATZROY
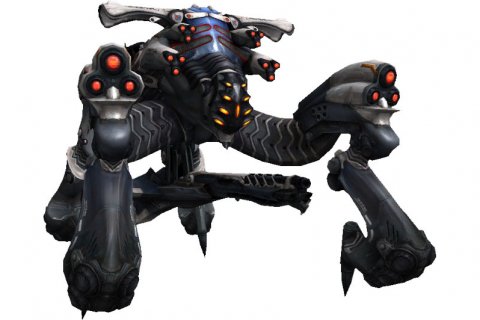 MILITARIZED UNITS : ARMATURES : Midlight Reaper
BOSS FIGHT : MIDLIGHT REAPER
- Start with Tide Turner to cast at least three or four buffs
- Switch to Undermine to cast at least three debuffs
- Switch to Dualcasting to stagger
- Switch to Slash & Burn when staggered
- Use War & Peace when necessary
MIDLIGHT REAPER :
- delivers devastating physical attacks
- susceptible to imperil
Eidolon
EIDOLON : BRYNHILDR
 OERBA DE VANILLE
 SAZH KATZROY
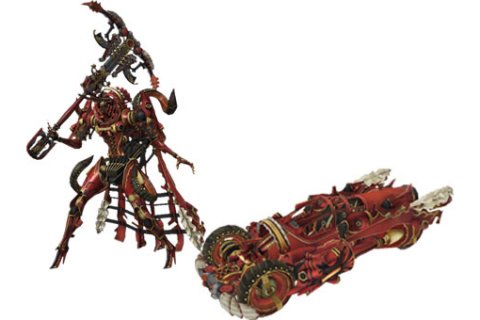 EIDOLON : BRYNHILDR
BOSS FIGHT : BRYNHILDR
- Start with Dualcasting until HP is low
- Switch to Symbiosis to cast buffs
- Repeat as necessary until fight's over
BRYNHILDR :
- yields to those who amass chain bonuses
- yields to those who strengthen their allies
Chapter 9 - CHAPTER NINE : THE EVENT CHAPTERS, THE THIRTEEN DAYS, FFXIII INFOS, BATTLES, BOSS FIGHTS
Battle
MILITARIZED UNITS : DRONES : Deckdrone , SOLDIERS : PSICOM AIRBORNE : PSICOM Dragoon
 LIGHTNING FARRON
 HOPE ESTHEIM
 MYSTERIOUS WOMAN : OERBA YUN FANG
 MILITARIZED UNITS : DRONES : Deckdrone
 SOLDIERS : PSICOM AIRBORNE : PSICOM Dragoon
MONSTERS : DECKDRONES [3] | PSICOM DRAGOONS [2]
- Start with Aggression using Blitz to quickly stagger one of the Deckdrones
- Use attack to quickly take out the staggered Deckdrone
- Switch to Relentless Assault to quickly stagger the remaining Deckdrones
- Switch to Aggression to quickly take it out
- repeat as needed until no more Deckdrones left
- Switch to Relentless Assault to quickly stagger the PSICOM Dragoon
- Switch to Aggression to quickly take it out
- Repeat as needed until no more PSICOM Dragoons left
- Use Tireless Charge & Diversity as needed to keep HP topped up
Battle
MILITARIZED UNITS : DRONES : Deckdrone
 LIGHTNING FARRON
 HOPE ESTHEIM
 MYSTERIOUS WOMAN : OERBA YUN FANG
 MILITARIZED UNITS : DRONES : Deckdrone
MONSTERS : DECKDRONES [4]
- Start with Relentless Assault to quickly stagger
- Switch to Aggression to quickly take it out
- Repeat as necessary until all Deckdrones gone
- Use Tireless Charge & Diversity as needed
Battle
MILITARIZED UNITS : VESPIDS : Vespid Soldier, MILITARIZED UNITS : ARMADONS : Thermadon
 OERBA DE VANILLE
 SAZH KATZROY
 MILITARIZED UNITS : VESPIDS : Vespid Soldier
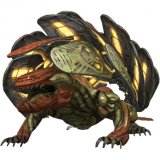 MILITARIZED UNITS : ARMADONS : Thermadon
MONSTERS : VESPID SOLDIERS [3] | THERMADON [1]
- Try for Preemptive Strike
- Use Slash & Burn using Blitz to quickly take out Vespid Soldiers
- Switch to Undermine to cast debuffs and stagger Thermadon
- Switch to Divide & Conquer to finish casting debuffs (need at least 4 debuffs)
- Switch to Slash & Burn to quickly take out Thermadon
- Use War & Peace as needed
Battle
MILITARIZED UNITS : VESPIDS : Vespid Soldier, MILITARIZED UNITS : DRONES : Deckdrone
 LIGHTNING FARRON
 HOPE ESTHEIM
 MYSTERIOUS WOMAN : OERBA YUN FANG
 MILITARIZED UNITS : VESPIDS : Vespid Soldier
 MILITARIZED UNITS : DRONES : Deckdrone
MONSTERS : VESPID SOLDIERS [2] | DECKDRONES [3]
- Start with Relentless Assault to quickly stagger Vespid Soldier
- Switch to Aggression to quickly take it out
- repeat as needed until both Vespid Soldiers are taken out
- Switch to Relentless Assault to quickly stagger Deckdrone
- Switch to Aggression to quickly take it out
- Repeat as needed until all three Deckdrones are taken out
- Use War & Peace as needed
Battle
MILITARIZED UNITS : VESPIDS : Vespid Soldier, MILITARIZED UNITS : DRONES : Deckdrone
 LIGHTNING FARRON
 HOPE ESTHEIM
 MYSTERIOUS WOMAN : OERBA YUN FANG
 MILITARIZED UNITS : VESPIDS : Vespid Soldier
 MILITARIZED UNITS : DRONES : Deckdrone
MONSTERS : VESPID SOLDIER [1] | DECKDRONES [4]
- Try for Preemptive Strike or use Deceptisol
- Start with Aggression using Blitz to quickly take out Vespid Soldier first
- Continue using Blitz to quickly take out the rest of the Deckdrones
- Switch to Relentless Assault to quickly stagger the last Deckdrone
- Switch to Aggression to quickly take it out
- Use Combat Clinic if needed
Battle
SOLDIERS : PSICOM AIRBORNE : PSICOM Dragoon
 LIGHTNING FARRON
 HOPE ESTHEIM
 MYSTERIOUS WOMAN : OERBA YUN FANG
 SOLDIERS : PSICOM AIRBORNE : PSICOM Dragoon
MONSTERS : PSICOM DRAGOONS [4]
- Use Deceptisol to stagger all four of them
- Start with Aggression using Blitz to quickly them all out
- Use Tireless Charge as needed
Battle
SOLDIERS : PSICOM ELITES : PSICOM Reaver, SOLDIERS : PSICOM AIRBORNE : PSICOM Dragoon
 LIGHTNING FARRON
 OERBA DE VANILLE
 SAZH KATZROY
 SOLDIERS : PSICOM ELITES : PSICOM Reaver
 SOLDIERS : PSICOM AIRBORNE : PSICOM Dragoon
MONSTERS : PSICOM REAVER [1] | PSICOM DRAGOON [4]
- Start with Diversity to stagger PSICOM Dragoon
- Switch to Tireless Charge to quickly take it out
- repeat as necessary until all four PSICOM Dragoons are taken out
- Switch to Relentless Assault to stagger PSICOM Reaver
- Switch to Aggression to quickly take it out
- Use Convalescence as needed to keep HP topped up
Boss
OTHER : FAL'CIE : Barthandelus
 LIGHTNING FARRON
 OERBA DE VANILLE
 SAZH KATZROY
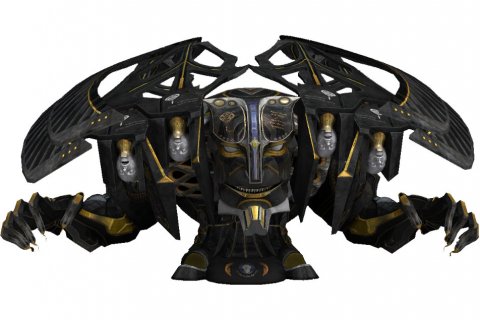 OTHER : FAL'CIE : Barthandelus
BOSS FIGHT : BARTHANDELUS
- Upgrade weapons & Equipments before the fight
- Cast Fortisol & Aegisol before the fight
- Start with Relentless Assault to quickly stagger Pauldron/Ailette
- Switch to Aggression to quickly take it out
- Repeat as necessary until all Pauldrons/Ailettes are taken out
- Use Diversity/Tireless Charge/Convalescence as Needed
- Start with Relentless Assault on Barthandelus for stagger intitative
- Switch to Smart Bomb to cast debuffs until staggered
- Switch to Aggression once staggered
- Use Diversity/Tireless Charge/Convalescence as needed
- Repeat as necessary until fight's over
BARTHANDELUS :
- difficult to damage until armor has been destoryed
- immune to all status ailments
RIGHT PAULDRON :
- executes powerful magic attacks
- coordinates attacks against a single target
- healed by fire damage
- vulnerable to ice damage
RIGHT AILETTE :
- executes powerful magic attacks
- coordinates attacks against a single target
- healed by lightning damage
- vulnerable to water damage
LEFT PAULDRON :
- executes powerful magic attacks
- coordinates attacks against a single target
- healed by water damage
- vulnerable to lightning damage
LEFT AILETTE :
- executes powerful magic attacks
- coordinates attacks against a single target
- healed by ice damage
- vulnerable to fire damage
Chapter 10 - CHATPER TEN : THE EVENT CHAPTERS, THE THIRTEEN DAYS, FFXIII INFOS, BATTLES, BOSS FIGHTS
Battle
PULSE AUTOMATA : PULSEWORK SOLDIERS : Pulsework Knight
 LIGHTNING FARRON
 OERBA DE VANILLE
 SAZH KATZROY
 PULSE AUTOMATA : PULSEWORK SOLDIERS : Pulsework Knight
MONSTERS : PULSEWORK KNIGHT [2]
- Start with Smart Bomb to cast debuffs
- Switch to Devasation when staggered to cast more debuffs if needed (need at least 4)
- Switch to Aggression when staggered if all 4 debuffs are casted
- Use Diversity/Tireless Charge as needed
Battle
PULSE AUTOMATA : BOMBS : Circuitron
 LIGHTNING FARRON
 OERBA DE VANILLE
 SAZH KATZROY
 PULSE AUTOMATA : BOMBS : Circuitron
MONSTERS : CIRCUITRON [3]
- Start with Aggression using Blitz to quickly take them all out
Battle
FERAL CREATURES : NUDIBRANCHS : Noctilucale
 LIGHTNING FARRON
 OERBA DE VANILLE
 SAZH KATZROY
 FERAL CREATURES : NUDIBRANCHS : Noctilucale
MONSTERS : NOCTILUCALES [5]
- Start with Aggression using Blitz to quickly take them out
Battle
FERAL CREATURES : FLANS : Phosphoric Ooze
 LIGHTNING FARRON
 OERBA DE VANILLE
 SAZH KATZROY
 FERAL CREATURES : FLANS : Phosphoric Ooze
MONSTERS : PHOSPHORIC OOZE [3]
- Stay in Relentless Assault using Blitz to quickly take them out
Battle
FERAL CREATURES : FLANS : Phosphoric Ooze, FERAL CREATURES : NUDIBRANCHS : Noctilucale
 LIGHTNING FARRON
 OERBA DE VANILLE
 SAZH KATZROY
 FERAL CREATURES : FLANS : Phosphoric Ooze
 FERAL CREATURES : NUDIBRANCHS : Noctilucale
MONSTERS : PHOSPHORIC OOZE [2] | NOCTILUCALES [3]
- Start with Aggression to quickly take out the Noctilucales
- Switch to Relentless Assault to quickly take out Phosphoric Ooze
Battle
FERAL CREATURES : FLANS : Phosphoric Ooze
 LIGHTNING FARRON
 OERBA DE VANILLE
 SAZH KATZROY
 FERAL CREATURES : FLANS : Phosphoric Ooze
MONSTERS : PHOSPHORIC OOZE [4]
- Stay in Relentess Assault using Blitz to quickly take them out
- Use Ruin on the last one to quickly take it out
Battle
FERAL CREATURES : DAEMONS : Stikini, FERAL CREATURES : DAEMONS : Skata'ne
 LIGHTNING FARRON
 OERBA DE VANILLE
 SAZH KATZROY
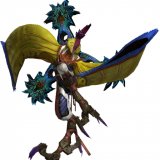 FERAL CREATURES : DAEMONS : Stikini
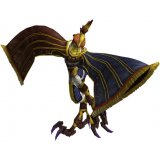 FERAL CREATURES : DAEMONS : Skata'ne
MONSTERS : STIKINI [1-2] | SKATA'NE [1-2]
- Start with Smart Bomb to quickly take out Stikini first
- Switch to Aggression when staggered
- Switch back to Smart Bomb to quickly take out Skata'ne to quickly take it out
Battle
FERAL CREATURES : DAEMONS : Stikini, FERAL CREATURES : DAEMONS : Skata'ne, PULSE AUTOMATA : BOMBS : Circuitron
 LIGHTNING FARRON
 OERBA DE VANILLE
 SAZH KATZROY
 FERAL CREATURES : DAEMONS : Stikini
 FERAL CREATURES : DAEMONS : Skata'ne
 PULSE AUTOMATA : BOMBS : Circuitron
MONSTERS : STIKINI [1] | SKATA'NE [1] | CIRCUITRON [1]
- Start with Smart Bomb to quickly take out Circuitron first
- Quickly stagger Stikini with Smart Bomb
- Switch to Aggression when staggered to quickly take it out
- repeat as necessary for Skata'ne
- Use Diveristy/Tireless Charge as needed
Battle
PULSE AUTOMATA : CENTAURIONS : Berserker
 LIGHTNING FARRON
 OERBA DE VANILLE
 SAZH KATZROY
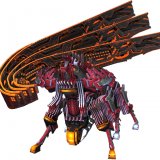 PULSE AUTOMATA : CENTAURIONS : Berserker
MONSTERS : BERSERKER [1]
- Try for Preemptive Strike to stagger
- Start with Smart Bomb to cast debuffs
- Switch to Devasation to finish casting debuffs when staggered
- Use aggression when staggered after all 4 debuffs are casted
- Use Diversity/Tireless Charge as needed
Battle
FERAL CREATURES : SPOOKS : Imp
 LIGHTNING FARRON
 OERBA DE VANILLE
 SAZH KATZROY
 FERAL CREATURES : SPOOKS : Imp
MONSTERS : IMP [3-4]
- Stay in Relentless Assault using Blitz to quickly take them all out
Battle
FERAL CREATURES : FLANS : Phosphoric Ooze, FERAL CREATURES : SPOOKS : Imp
 LIGHTNING FARRON
 OERBA DE VANILLE
 SAZH KATZROY
 FERAL CREATURES : FLANS : Phosphoric Ooze
 FERAL CREATURES : SPOOKS : Imp
MONSTERS : PHOSPHORIC OOZE [2] | IMPS [3]
- Stay in Relentless Assault to quickly take them all out with Blitz
- Use Ruin on last Phosphoric Ooze
Battle
FERAL CREATURES : BEHEMOTHS : Greater Behemoth
 LIGHTNING FARRON
 OERBA DE VANILLE
 SAZH KATZROY
 FERAL CREATURES : BEHEMOTHS : Greater Behemoth
MONSTERS : GREATER BEHEMOTH [1]
- Try for Preemptive Strike
- Start with Smart Bomb to cast debuffs
- Switch to Aggression after all 4 debuffs casted when staggered
- Use Diversity/Tireless Charge as needed
Battle
FERAL CREATURES : BEHEMOTHS : Greater Behemoth, FERAL CREATURES : NUDIBRANCHS : Noctilucale
 LIGHTNING FARRON
 OERBA DE VANILLE
 SAZH KATZROY
 FERAL CREATURES : BEHEMOTHS : Greater Behemoth
 FERAL CREATURES : NUDIBRANCHS : Noctilucale
MONSTERS : GREATER BEHEMOTH [1] | NOCTILUCALES [3]
- Try for Preemptive Strike
- Start with Aggression using Blitz to quickly take out Noctilucales
- Switch to Smart Bomb to cast debuffs onto Greater Behemoth
- Switch to Aggression if all 4 debuffs are casted when staggered
- Use Diversity/Tireless Charge as needed
Battle
FERAL CREATURES : BEHEMOTHS : Greater Behemoth, FERAL CREATURES : SPOOKS : Imp
 LIGHTNING FARRON
 OERBA DE VANILLE
 SAZH KATZROY
 FERAL CREATURES : BEHEMOTHS : Greater Behemoth
 FERAL CREATURES : SPOOKS : Imp
MONSTERS : GREATER BEHEMOTH [1] | IMPS [3]
- Try for Preemptive Strike
- Start with Aggression using Blitz to quickly take out Imps
- Switch to Smart Bomb to cast debuffs on Greater Behemoth if not staggered
- Switch to Aggression to quickly take it out
- Use Diversity/Tireless Charge as needed
Battle
PULSE AUTOMATA : PULSEWORK SOLDIERS : Pulsework Knight, FERAL CREATURES : FLANS : Phosphoric Ooze
 LIGHTNING FARRON
 OERBA DE VANILLE
 SAZH KATZROY
 PULSE AUTOMATA : PULSEWORK SOLDIERS : Pulsework Knight
 FERAL CREATURES : FLANS : Phosphoric Ooze
MONSTERS : PULSEWORK KNIGHT [1] | PHOSPHORIC OOZE [2]
- Use Deceptisol before the fight
- Start with Relentless Assault using Ruinga to take them all out quickly
Battle
PULSE AUTOMATA : PULSEWORK SOLDIERS : Pulsework Knight, FERAL CREATURES : FLANS : Phosphoric Ooze
 LIGHTNING FARRON
 OERBA DE VANILLE
 SAZH KATZROY
 PULSE AUTOMATA : PULSEWORK SOLDIERS : Pulsework Knight
 FERAL CREATURES : FLANS : Phosphoric Ooze
MONSTERS : PULSEWORK KNIGHT [2] | PHOSPHORIC OOZE [3]
- Use Deceptisol before the fight to stagger
- Start with Aggression using Ruinga to quickly take them all out
Battle
PULSE AUTOMATA : PULSEWORK SOLDIERS : Pulsework Knight
 LIGHTNING FARRON
 OERBA DE VANILLE
 SAZH KATZROY
 PULSE AUTOMATA : PULSEWORK SOLDIERS : Pulsework Knight
MONSTERS : PULSEWORK KNIGHTS [3]
- Try for Preemptive Strike to stagger
- Start with Aggression using Blitz to quickly take them all out
Battle
FERAL CREATURES : DAEMONS : Stikini, PULSE AUTOMATA : PULSEWORK SOLDIERS : Pulsework Knight
 LIGHTNING FARRON
 OERBA DE VANILLE
 SAZH KATZROY
 FERAL CREATURES : DAEMONS : Stikini
 PULSE AUTOMATA : PULSEWORK SOLDIERS : Pulsework Knight
MONSTERS : STIKINI [1] | PULSEWORK KNIGHT [2]
- Use Deceptisol to stagger
- Start with Relentless Assault using Ruinga to quickly take out Stikini first
- Switch to Smart Bomb to cast debuffs on Pulsework Knights
- Switch to Aggression to quickly take it out
- Use Diversity/Tireless Charge as needed
Battle
PULSE AUTOMATA : PULSEWORK SOLDIERS : Pulsework Knight, FERAL CREATURES : SPOOKS : Imp
 LIGHTNING FARRON
 OERBA DE VANILLE
 SAZH KATZROY
 PULSE AUTOMATA : PULSEWORK SOLDIERS : Pulsework Knight
 FERAL CREATURES : SPOOKS : Imp
MONSTERS : PULSEWORK KNIGHTS [2] | IMPS [4]
- Use Deceptisol before the fight to stagger
- Start with Relentless Assault using Ruinga quickly take out Pulsework Knights & IMPS
- Switch to Smart Bomb if needed to stagger last Pulsework Knight
- Switch to Aggression to quickly take it out
- Use Diversity/Tireless Charge as needed
Battle
FERAL CREATURES : BEHEMOTHS : Greater Behemoth, FERAL CREATURES : DAEMONS : Stikini, FERAL CREATURES : DAEMONS : Skata'ne
 LIGHTNING FARRON
 OERBA DE VANILLE
 SAZH KATZROY
 FERAL CREATURES : BEHEMOTHS : Greater Behemoth
 FERAL CREATURES : DAEMONS : Stikini
 FERAL CREATURES : DAEMONS : Skata'ne
MONSTERS : GREATER BEHEMOTH [1] | STIKINI [1] | SKATA'NE [2]
- Use Deceptisol before the fight to stagger
- Start with Relentless Assault using Ruinga to quickly take out Stikini & Skata'ne
- Switch to Smart Bomb to quickly stagger Greater Behemoth & cast debuffs
- Switch to Aggression to finish it off
- Use Diversity/Tireless Charge as needed
Boss
OTHERS : L'CIE : Cid Raines
 LIGHTNING FARRON
 OERBA DE VANILLE
 SAZH KATZROY
 OTHERS : L'CIE : Cid Raines
BOSS FIGHT : CID RAINES
- Start with Smart Bomb to cast debuffs
- Switch to Devastation when staggered to finish casting debuffs
- Switch to Aggression when staggered if all debuff casted (need at least 4)
- Use Diversity/Tireless Charge as needed
CID RAINES :
- delivers devastating physical attacks
- executes powerful magic attacks
- susceptible to Slow
- plans actions according to target's role
Eidolon
OTHERS : EIDOLONS : Bahamut
 LIGHTNING FARRON
 OERBA DE VANILLE
 MYSTERIOUS WOMAN : OERBA YUN FANG
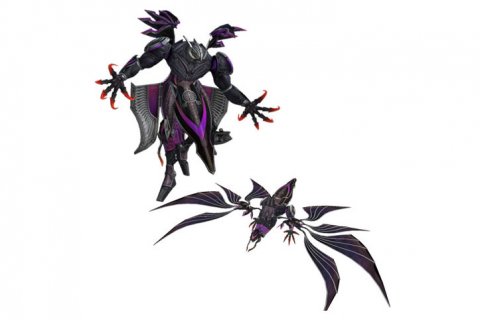 OTHERS : EIDOLONS : Bahamut
BOSS FIGHT : BAHAMUT
- Start with Safe Submersion to cast debuffs
- Switch to Attrition to continue casting debuffs
- Switch to Perseverance heal and continue casting debuffs
- Use Combat Clinic when needed to keep HP topped up
BAHAMUT :
- yields to those who amass chain bonuses
- yields to those who defend against and endure attacks
- yields to those who weaken and debilitate their enemies
Chapter 11 - CHAPTER ELEVEN : THE EVENT CHAPTERS, THE THIRTEEN DAYS, FFXIII INFOS, BATTLES, BOSS FIGHTS
Battle
FERAL CREATURES : BEASTS : Managarmr, FERAL CREATURES : WYVERNS : Amphisbaena
 LIGHTNING FARRON
 OERBA DE VANILLE
 SAZH KATZROY
 FERAL CREATURES : BEASTS : Managarmr
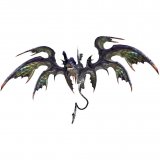 FERAL CREATURES : WYVERNS : Amphisbaena
MONSTERS : SVAROG [1] | MANAGARMR [1]
- Start with Decimation while Haste is being casted
- Switch to Relentless Assault to quickly take out Managarmr
- Switch to convalescence to quickly heal up
- Switch to Smart Bomb to cast at least three debuffs on Amphisbaena
- Switch to Relentless Assault to quickly stagger
- Switch to Aggression when staggered
Battle
FERAL CREATURES : WYVERNS : Amphisbaena
 LIGHTNING FARRON
 OERBA DE VANILLE
 SAZH KATZROY
 FERAL CREATURES : WYVERNS : Amphisbaena
MONSTERS : AMPHISBAENA [1]
- Start with Decimation while Haste is being casted
- Switch to Smart Bomb to cast at least three debuffs
- Switch to Aggression while staggered
Battle
FERAL CREATURES : DAEMONS : Yaksha, FERAL CREATURES : DAEMONS : Yakshini
 LIGHTNING FARRON
 OERBA DE VANILLE
 SAZH KATZROY
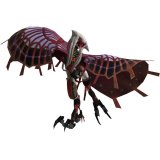 FERAL CREATURES : DAEMONS : Yaksha
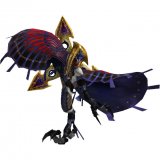 FERAL CREATURES : DAEMONS : Yakshini
MONSTERS : YAKSHA [2] | YAKSHINI [2]
- Try for Preemptive Strike
- Start with Decimation using Ruinga while Haste is being casted
Battle
CIE'TH : SHAMBLING CIE'TH : Vampire, CIE'TH : SHAMBLING CIE'TH : Taxim
 LIGHTNING FARRON
 OERBA DE VANILLE
 SAZH KATZROY
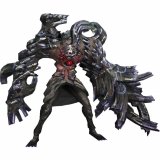 CIE'TH : SHAMBLING CIE'TH : Vampire
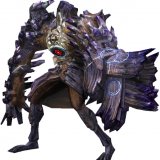 CIE'TH : SHAMBLING CIE'TH : Taxim
MONSTERS : VAMPIRE [1] | TAXIM [1]
- Try for Preemptive Strike
- Start with Taxim on Decimation while Haste is being casted
- Switch to Smart Bomb to quickly take out Taxim
- Repeat as necessary with Vampire
Battle
CIE'TH : WINGED CIE'TH : Varcolaci, CIE'TH : SHAMBLING CIE'TH : Vampire
 LIGHTNING FARRON
 OERBA DE VANILLE
 SAZH KATZROY
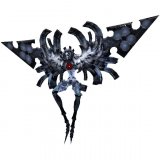 CIE'TH : WINGED CIE'TH : Varcolaci
 CIE'TH : SHAMBLING CIE'TH : Vampire
MONSTERS : VARCOLACI [1] | VAMPIRE [1]
- Try for Preemptive Strike
- Start with Varcolaci using Ruinga on Decimation while Haste is being casted to quickly take it out
- Switch to Smart Bomb on Vampire until Staggered
- Switch to Aggression to quickly take out Vampire
Battle
CIE'TH : UNUSUAL CIE'TH : Vetala
 LIGHTNING FARRON
 OERBA DE VANILLE
 SAZH KATZROY
 CIE'TH : UNUSUAL CIE'TH : Vetala
MONSTERS : VETALA [1]
- Try for Preemptive Strike
- Start with Decimation using auto-attack while Haste is being casted
- Switch to Smart Bomb to cast at least three debuffs to stagger
- Switch to Aggression when staggered
Battle
CIE'TH : UNUSUAL CIE'TH : Seeker, CIE'TH : WINGED CIE'TH : Chonchon
 LIGHTNING FARRON
 OERBA DE VANILLE
 SAZH KATZROY
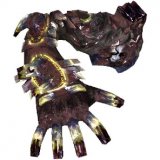 CIE'TH : UNUSUAL CIE'TH : Seeker
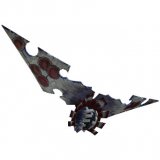 CIE'TH : WINGED CIE'TH : Chonchon
MONSTERS : SEEKERS [5] | CHONCHON [2-3]
- Start with Decimation using Ruinga to quickly take them all out while Haste is beng casted
Battle
CIE'TH : SHAMBLING CIE'TH : Vampire, CIE'TH : UNUSUAL CIE'TH : Seeker
 LIGHTNING FARRON
 OERBA DE VANILLE
 SAZH KATZROY
 CIE'TH : SHAMBLING CIE'TH : Vampire
 CIE'TH : UNUSUAL CIE'TH : Seeker
MONSTERS : VAMPIRE [1] | SEEKER [1]
- Try for Preemptive Strike
- Start with Decimation using Ruinga to quickly take out Seeker while Haste is being casted
- Switch to Smart Bomb until Vampire staggered
- Switch to Aggression to quickly take it out
Battle
CIE'TH : SHAMBLING CIE'TH : Vampire, CIE'TH : UNUSUAL CIE'TH : Seeker
 LIGHTNING FARRON
 OERBA DE VANILLE
 SAZH KATZROY
 CIE'TH : SHAMBLING CIE'TH : Vampire
 CIE'TH : UNUSUAL CIE'TH : Seeker
MONSTERS : VAMPIRE [1] | SEEKERS [4]
- Try for Preemptive Strike
- Start with Decimation using Ruinga to quickly take out Seekers while Haste is being casted
- Switch to Smart Bomb to cast at least three debuffs on Vampire until staggered
- Switch to Aggression to quickly take it out
Battle
CIE'TH : UNUSUAL CIE'TH : Vetala, CIE'TH : WINGED CIE'TH : Chonchon
 LIGHTNING FARRON
 OERBA DE VANILLE
 SAZH KATZROY
 CIE'TH : UNUSUAL CIE'TH : Vetala
 CIE'TH : WINGED CIE'TH : Chonchon
MONSTERS : VETALA [1] | CHONCHON [3]
- Try for Preemptive Strike
- Start with Decimation using Ruinga to quickly take out ChonChons while Haste is being casted
- Switch to Smart Bomb on Vetala to cast at least three debuffs
- Switch to Aggression to quickly take it out when staggered
Battle
CIE'TH : SHAMBLING CIE'TH : Taxim
 LIGHTNING FARRON
 OERBA DE VANILLE
 SAZH KATZROY
 CIE'TH : SHAMBLING CIE'TH : Taxim
MONSTERS : TAXIM [3]
- Try for Preemptive Strike
- Start with Decimation using Blitz & Ruinga to quickly stagger while Haste is being casted
- Switch to Aggression using Blitz & Ruinga to quickly take it out
- Switch to Smart Bomb on last Taxim to quickly stagger
- Switch to Aggression to quickly take it out
Battle
CIE'TH : WINGED CIE'TH : Varcolaci, CIE'TH : UNUSUAL CIE'TH : Seeker
 LIGHTNING FARRON
 OERBA DE VANILLE
 SAZH KATZROY
 CIE'TH : WINGED CIE'TH : Varcolaci
 CIE'TH : UNUSUAL CIE'TH : Seeker
MONSTERS : VARCOLACI [2] | SEEKERS [3]
- Try for Preemptive Strike
- Start with Decimation using Blitz & Ruinga while Haste is being casted to quickly take out Seekers
- Switch to Aggression using Ruinga to quickly take out the Varcolaci
Battle
FERAL CREATURES : DAEMONS : Yaksha
 LIGHTNING FARRON
 OERBA DE VANILLE
 SAZH KATZROY
 FERAL CREATURES : DAEMONS : Yaksha
MONSTERS : YAKSHA [2]
- Top up CP Points to depletion
- Stay in Decimation for entire fight using Blitz & Ruinga to quickly take them both out
Battle
CIE'TH : SHAMBLING CIE'TH : Strigoi
 LIGHTNING FARRON
 OERBA DE VANILLE
 SAZH KATZROY
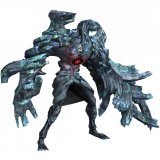 CIE'TH : SHAMBLING CIE'TH : Strigoi
MONSTERS : STRIGOI [1]
- Try for Preemptive Strike
- Start with Decimation while haste is being casted
- Switch to Smart Bomb to cast at least three debuffs
- Switch to Aggression if needed to quickly take it out
Battle
CIE'TH : SHAMBLING CIE'TH : Strigoi
 LIGHTNING FARRON
 OERBA DE VANILLE
 SAZH KATZROY
 CIE'TH : SHAMBLING CIE'TH : Strigoi
MONSTERS : STRIGOI [2]
- Try for Preemptive Strike
- Start with Decimation using Ruinga & Blitz while Haste is being casted
- Switch to Smart Bomb to cast at least three debuffs and quickly stagger
- Repeat as needed on last Strigoi
Battle
FERAL CREATURES : DAEMONS : Yakshini, FERAL CREATURES : DAEMONS : Stikini
 LIGHTNING FARRON
 OERBA DE VANILLE
 SAZH KATZROY
 FERAL CREATURES : DAEMONS : Yakshini
 FERAL CREATURES : DAEMONS : Stikini
MONSTERS : YAKSHINI [1] | STIKINI [2]
- Try for Preemptive Strike
- Stay in Decimation for the entire fight using Blitz & Ruinga to quickly take them all out
Battle
FERAL CREATURES : FLAN : Ferruginous Pudding, FERAL CREATURES : FLAN : Rust Pudding
 LIGHTNING FARRON
 OERBA DE VANILLE
 SAZH KATZROY
 FERAL CREATURES : FLAN : Ferruginous Pudding
 FERAL CREATURES : FLAN : Rust Pudding
MONSTERS : FERRUGINOUS PUDDING [1-2] | RUST PUDDING [1-2]
- Try for Preemptive Strike
- Start with Decimation using Blitz & Ruinga while Haste is being casted
- Switch to Smart Bomb to cast at least three debuffs
- Switch to Aggression to when staggered
- Repeat as necessary
Battle
PULSE AUTOMATA : BOMBS : Cryohedron
 LIGHTNING FARRON
 OERBA DE VANILLE
 SAZH KATZROY
 PULSE AUTOMATA : BOMBS : Cryohedron
MONSTERS : CRYOHEDRON [6]
- Stay in Decimation for the entire fight using Blitz & Ruinga to quickly take them all out
Battle
FERAL CREATURES : DAEMONS : Stikini, FERAL CREATURES : DAEMONS : Yaksha
 LIGHTNING FARRON
 OERBA DE VANILLE
 SAZH KATZROY
 FERAL CREATURES : DAEMONS : Stikini
 FERAL CREATURES : DAEMONS : Yaksha
MONSTERS : STIKINI [3] | YAKSHA [2]
- Stay in Decimation for the entire fight using Blitz & Ruinga to quickly take them all out
Battle
FERAL CREATURES : DAEMONS : Yaksha, FERAL CREATURES : DAEMONS : Skata'ne
 LIGHTNING FARRON
 OERBA DE VANILLE
 SAZH KATZROY
 FERAL CREATURES : DAEMONS : Yaksha
 FERAL CREATURES : DAEMONS : Skata'ne
MONSTERS : YAKSHA [3] | SKATA'NE [1]
- Stay in Decimation for the entire fight using Blitz & Ruina
Battle
CIE'TH : WINGED CIE'TH : Pijavica
 LIGHTNING FARRON
 OERBA DE VANILLE
 SAZH KATZROY
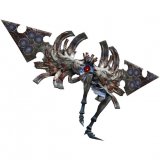 CIE'TH : WINGED CIE'TH : Pijavica
MONSTERS : PIJAVICA [2]
- Start with Decimation using Ruinga/Blitz while Haste is being casted
- Switch to Relentless Assault using Ruinga/Blitz to quickly stagger
- Switch to Aggression using Ruinga/Blitz to quickly take them out
- Use Convalescence as needed
Battle
CIE'TH : WINGED CIE'TH : Pijavica, CIE'TH : SHAMBLING CIE'TH : Strigoi
 LIGHTNING FARRON
 OERBA DE VANILLE
 SAZH KATZROY
 CIE'TH : WINGED CIE'TH : Pijavica
 CIE'TH : SHAMBLING CIE'TH : Strigoi
MONSTERS : PIJAVICA [2] | STRIGOI [1]
- Start with Decimation using Ruinga/Blitz on Pijavicas while Haste is being casted
- Switch to Relentless Assault using Ruinga/Blitz to quickly take out both Pijvicas
- Switch to Smart Bomb to casta debuffs or stagger Strigoi
- Switch to Aggression to quickly take out Strigoi
Battle
CIE'TH : SHAMBLING CIE'TH : Strigoi, CIE'TH : UNUSUAL CIE'TH : Seeker
 LIGHTNING FARRON
 OERBA DE VANILLE
 SAZH KATZROY
 CIE'TH : SHAMBLING CIE'TH : Strigoi
 CIE'TH : UNUSUAL CIE'TH : Seeker
MONSTERS : STRIGOI [1] | SEEKERS [3]
- Start with Decimation using Ruinga/Blitz to quickly stagger while Haste is being casted
- Switch to Aggression using Ruinga/Blitz to quickly take them all out
Battle
FERAL CREATURES : GOBLINS : Borgbear
 LIGHTNING FARRON
 OERBA DE VANILLE
 SAZH KATZROY
 FERAL CREATURES : GOBLINS : Borgbear
MONSTERS : BORGBEAR [2-3]
- Cast Libra at start of battle
- Start with Decimation using Blitz/Ruinga while Haste is being casted
- Switch to Smart Bomb to cast debuffs
- Switch to Aggression to quickly take them both out
Battle
FERAL CREATURES : BEHEMOTHS : Behemoth King, FERAL CREATURES : BEASTS : Gorgonopsid
 LIGHTNING FARRON
 OERBA DE VANILLE
 SAZH KATZROY
 FERAL CREATURES : BEHEMOTHS : Behemoth King
 FERAL CREATURES : BEASTS : Gorgonopsid
MONSTERS : BEHEMOTH KING [1] | GORGONOPSIDS [5]
- Start with Decimation using Blitz for two turns on Gorgonopsids while Haste is being casted
- Switch to Relentless Assault using Blitz to quickly take out Gorgonopsids
- Switch to Smart Bomb on Behemoth King until at least three Debuffs are casted
- Switch to Relentless Assault until staggered
- Use Convalescence as needed
Battle
FERAL CREATURES : SPOOKS : Verdelet, FERAL CREATURES : SPOOKS : Adroa
 LIGHTNING FARRON
 OERBA DE VANILLE
 SAZH KATZROY
 FERAL CREATURES : SPOOKS : Verdelet
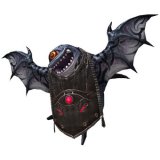 FERAL CREATURES : SPOOKS : Adroa
MONSTERS : VERDELET [1] | ADROA [6]
- Start with Decimation using Blitz/Ruinga while Haste is being casted
- Switch to Aggression using Blitz/Ruinga to quickly take them all out
Battle
FERAL CREATURES : ARMADILLONS : Navidon, FERAL CREATURES : BEASTS : Gorgonopsid
 LIGHTNING FARRON
 OERBA DE VANILLE
 SAZH KATZROY
 FERAL CREATURES : ARMADILLONS : Navidon
 FERAL CREATURES : BEASTS : Gorgonopsid
MONSTERS : NAVIDON [1] | GORGONOPSIDS [5]
- Start with Decimation using Blitz on Gorgonopsids for two turns while Haste is being casted
- Switch to Relentless Assault using Blitz to quickly take out Gorgonopsids
- Switch to Smart Bomb to cast debuffs and stagger Navidon
- Switch to Aggression to quickly take it out after at least three debuffs are casted
Battle
FERAL CREATURES : GOBLINS : Goblin Chieftain , FERAL CREATURES : GOBLINS : Goblin
 LIGHTNING FARRON
 OERBA DE VANILLE
 SAZH KATZROY
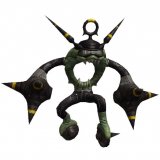 FERAL CREATURES : GOBLINS : Goblin Chieftain
 FERAL CREATURES : GOBLINS : Goblin
MONSTERS : GOBLIN CHIEFTAIN [1] | GOBLINS [4]
- Cast Libra on Goblin Chieftain at the start of battle
- Start with Decimation using Blitz/Ruinga on Goblins while Haste is being casted
- Switch to Aggression using Blitz/Ruinga to quickly take them all out
- Use Diversity as needed
Battle
FERAL CREATURES : SAHAGIN : Orobon
 LIGHTNING FARRON
 OERBA DE VANILLE
 SAZH KATZROY
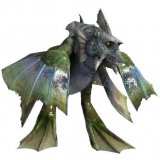 FERAL CREATURES : SAHAGIN : Orobon
MONSTERS : OROBON [1]
- Start with Decimation until Haste is being casted
- Switch to Relentless Assault to quickly stagger
- Switch to Aggression to quickly take it out
Battle
FERAL CREATURES : SAHAGIN : Orobon, FERAL CREATURES : SAHAGIN : Sahagin
 LIGHTNING FARRON
 OERBA DE VANILLE
 SAZH KATZROY
 FERAL CREATURES : SAHAGIN : Orobon
 FERAL CREATURES : SAHAGIN : Sahagin
MONSTERS : OROBON [1] | SAHAGINS [5]
- Start with Decimation using Blitz/Ruinga while Haste is being casted
- Switch to Aggression using Blitz/Ruinga to quickly take them out
- Switch to Relentless Assault if Orobon still standing to quickly stagger
- Switch to Aggression to quickly take it out
- Use Diversity as needed
Battle
FERAL CREATURES : CACTUARS : Cactuar
 LIGHTNING FARRON
 OERBA DE VANILLE
 SAZH KATZROY
 FERAL CREATURES : CACTUARS : Cactuar
MONSTERS : CACTUAR [1]
- Cast Libra at start of battle
- Switch to Relentless Assault after Haste is casted
- Use Diversity as needed
Battle
FERAL CREATURES : SAHAGIN : Sahagin, FERAL CREATURES : TERRAQUATICS : Ceratoraptor
 LIGHTNING FARRON
 OERBA DE VANILLE
 SAZH KATZROY
 FERAL CREATURES : SAHAGIN : Sahagin
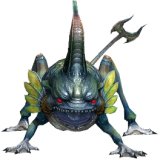 FERAL CREATURES : TERRAQUATICS : Ceratoraptor
MONSTERS : SAHAGINS [2] | CERATORAPTORS [6]
- Cast Libra on Ceratoraptor start of battle
- Start with Decimation using Blitz/Ruinga until Haste is casted
- Switch to Aggression using Blitz/Ruinga to quickly take them all out
- Use Diversity when needed
Battle
PULSE AUTOMATA : PULSEWORK SOLDIERS : Pulsework Champion
 LIGHTNING FARRON
 OERBA DE VANILLE
 SAZH KATZROY
 PULSE AUTOMATA : PULSEWORK SOLDIERS : Pulsework Champion
MONSTERS : PULSEWORK CHAMPION [1 - 2]
- Try for Preemptive Strike
- Cast Libra at start of battle
- Start with Decimation
- Switch to Smart Bomb to cast at least three debuffs after Haste is casted
- Switch to Aggression to quickly take it out
Battle
PULSE AUTOMATA : COMBAT ENGINEERS : Boxed Phalanx, PULSE AUTOMATA : COMBAT ENGINEERS : Hoplite
 LIGHTNING FARRON
 OERBA DE VANILLE
 SAZH KATZROY
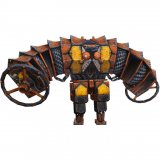 PULSE AUTOMATA : COMBAT ENGINEERS : Boxed Phalanx
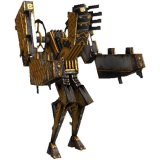 PULSE AUTOMATA : COMBAT ENGINEERS : Hoplite
MONSTERS : BOXED PHALANX [1] | HOPLITES [4}
- Cast Libra on Boxed Phalanx at start of battle
- Start with Decimation using Blitz/Ruinga until Haste is casted
- Switch to Relentless Assault using Blitz/Ruinga on Boxed Phalanx
- Use Convalescence as needed
Battle
PULSE AUTOMATA : COMBAT ENGINEERS : Hoplite, PULSE AUTOMATA : BOMBS : Cryohedron
 LIGHTNING FARRON
 OERBA DE VANILLE
 SAZH KATZROY
 PULSE AUTOMATA : COMBAT ENGINEERS : Hoplite
 PULSE AUTOMATA : BOMBS : Cryohedron
MONSTERS : HOPLITES [2] | CRYOHEDRONS [3]
- Start with Decimation using Blitz/Ruinga until Haste is Casted
- Switch to Aggression using Blitz/Ruinga to quickly take them out
Battle
PULSE AUTOMATA : COMBAT ENGINEERS : Hoplite
 LIGHTNING FARRON
 OERBA DE VANILLE
 SAZH KATZROY
 PULSE AUTOMATA : COMBAT ENGINEERS : Hoplite
MONSTERS : HOPLITES [2-5]
- Stay in Decimation for the entire fight using Blitz/Ruinga to quickly take them all out
Battle
PULSE AUTOMATA : BOMBS : Cryohedron
 LIGHTNING FARRON
 OERBA DE VANILLE
 SAZH KATZROY
 PULSE AUTOMATA : BOMBS : Cryohedron
MONSTERS : CRYOHEDRONS [2-4]
- Stay in Decimation using Blitz/Ruinga for the entire fight
Battle
PULSE AUTOMATA : COMBAT ENGINEERS : Ambling Bellows, PULSE AUTOMATA : COMBAT ENGINEERS : Hoplite
 LIGHTNING FARRON
 OERBA DE VANILLE
 SAZH KATZROY
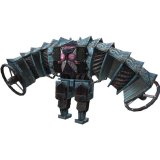 PULSE AUTOMATA : COMBAT ENGINEERS : Ambling Bellows
 PULSE AUTOMATA : COMBAT ENGINEERS : Hoplite
MONSTERS : AMBLING BELLOWS [1] | HOPLITES [3 - 4]
- Start with Decimation using Blitz/Ruinga Ambling Bellows while Haste/Enthunder is casted
- Switch to Relentless Assault using Blitz/Ruinga on Ambling Bellows to quickly take them all out
- Use Diversity as needed
Battle
FERAL CREATURES : FLAN : Rust Pudding
 LIGHTNING FARRON
 OERBA DE VANILLE
 SAZH KATZROY
 FERAL CREATURES : FLAN : Rust Pudding
MONSTERS : RUST PUDDINGS [1-2]
- Cast Libra at start of battle
- Stay in Decimation for the entire fight using Blitz/Ruinga
Battle
PULSE AUTOMATA : PULSEWORK SOLDIERS : Pulsework Champion , PULSE AUTOMATA : COMBAT ENGINEERS : Hoplite
 LIGHTNING FARRON
 OERBA DE VANILLE
 SAZH KATZROY
 PULSE AUTOMATA : PULSEWORK SOLDIERS : Pulsework Champion
 PULSE AUTOMATA : COMBAT ENGINEERS : Hoplite
MONSTERS : PULSEWORK CHAMPION [1] | HOPLITES [2]
- Try for Preemptive Strike
- Start with Decimation using Blitz/Ruinga on Hoplites while Haste is being casted
- Switch to Aggression when Pulsework Champion is staggered to quickly take it out
Battle
PULSE AUTOMATA : PULSEWORK SOLDIERS : Pulsework Champion , FERAL CREATURES : FLAN : Rust Pudding
 LIGHTNING FARRON
 OERBA DE VANILLE
 SAZH KATZROY
 PULSE AUTOMATA : PULSEWORK SOLDIERS : Pulsework Champion
 FERAL CREATURES : FLAN : Rust Pudding
MONSTERS : PULSEWORK CHAMPION [1] | RUST PUDDINGS [2]
- Use Deceptisol before fight
- Start with Aggression using Blitz/Ruinga to quickly take them all out
Battle
PULSE AUTOMATA : PULSEWORK SOLDIERS : Pulsework Champion , PULSE AUTOMATA : BOMBS : Cryohedron
 LIGHTNING FARRON
 OERBA DE VANILLE
 SAZH KATZROY
 PULSE AUTOMATA : PULSEWORK SOLDIERS : Pulsework Champion
 PULSE AUTOMATA : BOMBS : Cryohedron
MONSTERS : PULSEWORK CHAMPION [1] | CRYOHEDRONS [3]
- Start with Decimation while Haste is being casted
- Switch to Relentless Assault to quickly stagger Pulsework Champion
- Switch to Aggression to quickly take it out
- Use Blitz/Ruinga on remaining Cryohedrons
Battle
PULSE AUTOMATA : PULSEWORK SOLDIERS : Pulsework Champion , PULSE AUTOMATA : BOMBS : Cryohedron
 LIGHTNING FARRON
 OERBA DE VANILLE
 SAZH KATZROY
 PULSE AUTOMATA : PULSEWORK SOLDIERS : Pulsework Champion
 PULSE AUTOMATA : BOMBS : Cryohedron
MONSTERS : PULSEWORK CHAMPIONS [2] | CRYOHEDRONS [3]
- Start with Decimation using Blitz/Ruinga on Cryohedrons while Haste is being casted
- Switch to Aggression using Blitz/Ruinga to quickly take out Cryohedrons
- Switch to Relentless Assault to quickly stagger Pulsework Champions
- Switch to Aggression to quickly take it out
- Repeat as necessary
- Use Diversity as needed
Battle
FERAL CREATURES : FLAN : Rust Pudding, PULSE AUTOMATA : BOMBS : Cryohedron
 LIGHTNING FARRON
 OERBA DE VANILLE
 SAZH KATZROY
 FERAL CREATURES : FLAN : Rust Pudding
 PULSE AUTOMATA : BOMBS : Cryohedron
MONSTERS : RUST PUDDINGS [5] | CRYOHEDRONS [1 - 2]
- Start with Aggression using Blitz/Ruinga to quickly take them all out
Battle
FERAL CREATURES : SAHAGIN : Orobon, FERAL CREATURES : TERRAQUATICS : Ceratosaur
 LIGHTNING FARRON
 OERBA DE VANILLE
 SAZH KATZROY
 FERAL CREATURES : SAHAGIN : Orobon
 FERAL CREATURES : TERRAQUATICS : Ceratosaur
MONSTERS : OROBONS [2] | CERATOSAURS [3]
- Start with Decimation using Blitz/Ruinga while Haste is being casted
- Switch to Relentless Assault using Blitz/Ruinga to quickly take them all out
Battle
FERAL CREATURES : BEASTS : Uridimmu
 LIGHTNING FARRON
 OERBA DE VANILLE
 SAZH KATZROY
 FERAL CREATURES : BEASTS : Uridimmu
MONSTERS : URIDIMMU [5]
- Start with Decimation using Blitz while Haste is being casted
- Switch to Relentless Assualt using Blitz to quickly take them all out
Battle
FERAL CREATURES : BEASTS : Managarmr
 LIGHTNING FARRON
 OERBA DE VANILLE
 SAZH KATZROY
 FERAL CREATURES : BEASTS : Managarmr
MONSTERS : MANAGARMR [1]
- Cast Libra at start of battle
- Start with Decimation while Haste is being casted
- Switch to Relentless Assault to quickly take it out
Battle
FERAL CREATURES : GOBLINS : Goblin Chieftain , FERAL CREATURES : GOBLINS : Munchkin, FERAL CREATURES : GOBLINS : Goblin, FERAL CREATURES : GOBLINS : Munchkin Maestro
 LIGHTNING FARRON
 OERBA DE VANILLE
 SAZH KATZROY
 FERAL CREATURES : GOBLINS : Goblin Chieftain
 FERAL CREATURES : GOBLINS : Munchkin
 FERAL CREATURES : GOBLINS : Goblin
 FERAL CREATURES : GOBLINS : Munchkin Maestro
MONSTERS : GOBLIN CHIEFTAIN [1] | MUNCHKIN MAESTRO [1] | GOBLINS [2] | MUNCHKINS [2]
- Start with Decimation using Blitz/Ruinga while Haste is being casted
- Switch to Relentless Assault using Blitz/Ruinga to quickly take them out
Battle
FERAL CREATURES : BEASTS : Managarmr
 LIGHTNING FARRON
 OERBA DE VANILLE
 SAZH KATZROY
 FERAL CREATURES : BEASTS : Managarmr
MONSTERS : MANAGARMR [2]
- Start with Decimation using Blitz while Haste is being casted
- Switch to Relentless Assault using Blitz until one Managarmr is taken out
- Use auto attack in Relentless Assault to quickly take out the other Managarmr
- Use Diversity as needed
Battle
FERAL CREATURES : FLAN : Flan
 LIGHTNING FARRON
 OERBA DE VANILLE
 SAZH KATZROY
 FERAL CREATURES : FLAN : Flan
MONSTERS : FLANS [3]
- Switch to Aggression using Blitz/Ruinga to quickly take them all out
Battle
FERAL CREATURES : NUDIBRANCHS : Alraune
 LIGHTNING FARRON
 OERBA DE VANILLE
 SAZH KATZROY
 FERAL CREATURES : NUDIBRANCHS : Alraune
MONSTERS : ALRAUNE [5]
- Start with Aggression using Blitz/Ruinga to quickly take them all out
Battle
FERAL CREATURES : FLAN : Flan
 LIGHTNING FARRON
 OERBA DE VANILLE
 SAZH KATZROY
 FERAL CREATURES : FLAN : Flan
MONSTERS : FLANS [2]
- Start with Aggression using Blitz/Ruinga to quickly take them out
Battle
FERAL CREATURES : NUDIBRANCHS : Alraune, FERAL CREATURES : FLAN : Flan
 LIGHTNING FARRON
 OERBA DE VANILLE
 SAZH KATZROY
 FERAL CREATURES : NUDIBRANCHS : Alraune
 FERAL CREATURES : FLAN : Flan
MONSTERS : ALRAUNE [5] | FLAN [1]
- Start with Decimation using Ruinga while Haste is beng casted
- Switch to Aggression using Ruinga to quickly take them all out
Battle
FERAL CREATURES : FLAN : Dire Flan
 LIGHTNING FARRON
 OERBA DE VANILLE
 SAZH KATZROY
 FERAL CREATURES : FLAN : Dire Flan
MONSTERS : DIRE FLAN [1]
- Start with Smart Bomb to quickly stagger
- Switch to Aggression to quickly take it out
Battle
FERAL CREATURES : DAEMONS : Rakshasa, FERAL CREATURES : FLAN : Flan
 LIGHTNING FARRON
 OERBA DE VANILLE
 SAZH KATZROY
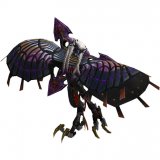 FERAL CREATURES : DAEMONS : Rakshasa
 FERAL CREATURES : FLAN : Flan
MONSTERS : RAKSHASA [1] | FLANS [4]
- Use Deceptisol before the fight
- Switch to Aggression and cast Libra on Rakshasa
- Use Blitz/Ruinga to quickly take out the Flans
- Switch to Tri-Disaster to quickly take out last Flan
- Switch to Smart Bomb to start stagger bar on Rakshasa
- Rotate between Smart Bomb & Tri-Disaster to quickly stagger
- Switch to Aggression to quickly take it out
Battle
FERAL CREATURES : BEASTS : Gorgonopsid
 LIGHTNING FARRON
 OERBA DE VANILLE
 SAZH KATZROY
 FERAL CREATURES : BEASTS : Gorgonopsid
MONSTERS : GORGONOPSID [3-5]
- Start with Decimation with two full turns using Blitz while Haste is being casted
- Switch to Relentless Assault Blitz to quickly take them out
Battle
FERAL CREATURES : FLAN : Ectopudding
 LIGHTNING FARRON
 OERBA DE VANILLE
 SAZH KATZROY
 FERAL CREATURES : FLAN : Ectopudding
MONSTER : ECTOPUDDING [1]
- Try for Preemptive Strike
- Cast Libra first
- Stay in Relentless Assault for the entire fight using Ruinga
Battle
FERAL CREATURES : BEASTS : Uridimmu, FERAL CREATURES : BEASTS : Gorgonopsid
 LIGHTNING FARRON
 OERBA DE VANILLE
 SAZH KATZROY
 FERAL CREATURES : BEASTS : Uridimmu
 FERAL CREATURES : BEASTS : Gorgonopsid
MONSTERS : URIDMMU [1] | GORGONOPSID [4]
- Start with Decimation to cast Haste on all party members
- Use Ruinga while Haste is being casted
- Switch to Aggression using Ruinga to quickly take them all out
- Use Diversity/Convalescence as needed
Battle
FERAL CREATURES : SPOOKS : Rangda
 LIGHTNING FARRON
 OERBA DE VANILLE
 SAZH KATZROY
 FERAL CREATURES : SPOOKS : Rangda
MONSTERS : RANGDA [5]
- Start with Decimation using Ruinga until Haste is casted
- Switch to Aggression using both Blitz/Ruinga to quickly take them out
Battle
FERAL CREATURES : SPOOKS : Leyak
 LIGHTNING FARRON
 OERBA DE VANILLE
 SAZH KATZROY
 FERAL CREATURES : SPOOKS : Leyak
MONSTERS : LEYAK [5]
- Start with Decimation using Ruinga while Haste is being casted
- Switch to Aggression using both Blitz/Ruinga to quickly take them out
Battle
FERAL CREATURES : BEASTS : Ugallu
 LIGHTNING FARRON
 OERBA DE VANILLE
 SAZH KATZROY
 FERAL CREATURES : BEASTS : Ugallu
MONSTERS : UGALLU [1]
- Cast Libra at the start of the battle
- Switch to Smart Bomb after Haste has been casted
- Switch to Aggression when staggered to quickly take it out
Battle
FERAL CREATURES : STALKERS : Triffid, FERAL CREATURES : NUDIBRANCHS : Alraune
 LIGHTNING FARRON
 OERBA DE VANILLE
 SAZH KATZROY
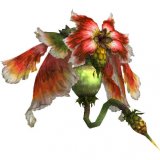 FERAL CREATURES : STALKERS : Triffid
 FERAL CREATURES : NUDIBRANCHS : Alraune
MONSTERS : TRIFFIDS [2] | ALRAUNES [3]
- Start with Decimation using Ruinga while Haste is being casted
- Switch to Aggression using Ruinga to quickly take them all out
Battle
FERAL CREATURES : WYVERNS : Svarog
 LIGHTNING FARRON
 OERBA DE VANILLE
 SAZH KATZROY
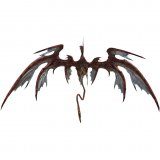 FERAL CREATURES : WYVERNS : Svarog
MONSTERS : SVAROG
- Cast Libra at start of the battle
- Switch to Smart Bomb after Haste is casted
- Switch to Aggression when staggered to quickly take it out
Battle
FERAL CREATURES : FLAN : Hybrid Flora, FERAL CREATURES : NUDIBRANCHS : Alraune
 LIGHTNING FARRON
 OERBA DE VANILLE
 SAZH KATZROY
 FERAL CREATURES : FLAN : Hybrid Flora
 FERAL CREATURES : NUDIBRANCHS : Alraune
MONSTERS : HYBRID FLORA [1] | ALRAUNES [3]
- Cast Libra at start of the battle
- Switch to Aggression using Ruinga after Haste is casted
- Switch to Smart Bomb using Fire to cast Debuffs and stagger
- Switch to Aggression to quickly take it out
Battle
FERAL CREATURES : FLAN : Hybrid Flora, FERAL CREATURES : STALKERS : Triffid
 LIGHTNING FARRON
 OERBA DE VANILLE
 SAZH KATZROY
 FERAL CREATURES : FLAN : Hybrid Flora
 FERAL CREATURES : STALKERS : Triffid
MONSTERS : HYBRID FLORA [1] | TRIFFIDS [2]
- Start with Decimation using Ruinga until Haste is casted
- Switch to Smart Bomb using Fira on Triffids to quickly take them out
- Use Fire on Hybrid Flora to quickly stagger while debuffs are casted
- Switch to Aggression using Ruin to quickly take it out
Battle
FERAL CREATURES : GOBLINS : Munchkin
 LIGHTNING FARRON
 OERBA DE VANILLE
 SAZH KATZROY
 FERAL CREATURES : GOBLINS : Munchkin
MONSTERS : MUNCHKINS [3-5]
- Start with Decimation using Ruinga while Haste is being casted
- Switch to Aggression using Blitz/Ruinga to quickly take them out
Battle
FERAL CREATURES : SPOOKS : Verdelet, FERAL CREATURES : SPOOKS : Adroa
 LIGHTNING FARRON
 OERBA DE VANILLE
 SAZH KATZROY
 FERAL CREATURES : SPOOKS : Verdelet
 FERAL CREATURES : SPOOKS : Adroa
MONSTERS : VERDELETS [2] | ADROA [4]
- Start with Decimation using Ruinga on Verdelets while Haste is being casted
- Switch to Aggression using Ruinga on Verdelets first to quickly take them out
- Continue using Ruinga on the rest of the Adroas to quickly take them out
- Use Diversity/Convalscence as needed
Battle
FERAL CREATURES : STALKERS : Triffid
 LIGHTNING FARRON
 OERBA DE VANILLE
 SAZH KATZROY
 FERAL CREATURES : STALKERS : Triffid
MONSTERS : TRIFFIDS [3]
- Start with Decimation using Blitz while Haste is being casted
- Switch to Aggression using Blitz to quickly take them all out
Battle
FERAL CREATURES : WYVERNS : Svarog, FERAL CREATURES : STALKERS : Triffid
 LIGHTNING FARRON
 OERBA DE VANILLE
 SAZH KATZROY
 FERAL CREATURES : WYVERNS : Svarog
 FERAL CREATURES : STALKERS : Triffid
MONSTERS : SVAROG [1] | TRIFFIDS [2]
- Start with Decimation using Ruinga until Haste is casted
- Switch to Tri-Disaster to quickly stagger and take out triffid
- Switch to Smart Bomb to start stagger bar on other triffid
- Switch back to Tri-Disaster to quickly stagger and take it out
- Switch to Smart Bomb to start stagger bar on Svarog
- Switch to Tri-Disaster to quickly stagger
- Switch to Aggression to quickly take it out
- Use Diversity/Convalscence as needed
Battle
CIE'TH : WINGED CIE'TH : Edimmu
 LIGHTNING FARRON
 OERBA DE VANILLE
 SAZH KATZROY
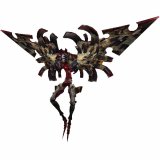 CIE'TH : WINGED CIE'TH : Edimmu
MONSTERS : EDIMMU [1]
- Start with Decimation using Ruinga while Haste is being casted
- Switch between Smart Bomb/Tri-Disaster to quickly stagger
- Switch to Aggression to quickly take it out
- Use Diversity/Convalscence as needed
Battle
FERAL CREATURES : FLAN : Hybrid Flora
 LIGHTNING FARRON
 OERBA DE VANILLE
 SAZH KATZROY
 FERAL CREATURES : FLAN : Hybrid Flora
MONSTERS : HYBRID FLORA [2]
- Try for Preemptive Strike
Start with Decimation using Ruinga while Haste is being casted
- Switch to Aggression using Ruinga to quickly take them out
Battle
FERAL CREATURES : FLAN : Hybrid Flora, FERAL CREATURES : NUDIBRANCHS : Alraune
 LIGHTNING FARRON
 OERBA DE VANILLE
 SAZH KATZROY
 FERAL CREATURES : FLAN : Hybrid Flora
 FERAL CREATURES : NUDIBRANCHS : Alraune
MONSTERS : HYBRID FLORA [1] | ALRAUNES [5]
- Try for Preemptive Strike
- Start with Decimation using Ruinga on Alraunes while Haste is being casted
- Switch to Aggression using Blitz/Ruinga to quickly take out Alraunes
- Switch to Smart Bomb to quickly stagger Hybrid Flora
- Switch to Aggression when staggered
Battle
FERAL CREATURES : GOBLINS : Munchkin Maestro, FERAL CREATURES : GOBLINS : Munchkin
 LIGHTNING FARRON
 OERBA DE VANILLE
 SAZH KATZROY
 FERAL CREATURES : GOBLINS : Munchkin Maestro
 FERAL CREATURES : GOBLINS : Munchkin
MONSTERS : MUNCHKIN MAESTRO [1] | MUNCHKINS [3-6]
- Start with Decimation using Ruinga while Haste is being casted
- Switch to Aggression using Blitz/Ruinga to quickly take them all out
Battle
CIE'TH : SHAMBLING CIE'TH : Taxim
 LIGHTNING FARRON
 OERBA DE VANILLE
 SAZH KATZROY
 CIE'TH : SHAMBLING CIE'TH : Taxim
MONSTERS : TAXIM [6]
- Start with Decimation using Blitz/Ruinga while Haste is being casted
- Switch to Aggression using Blitz/Ruinga to quickly take them out
- Switch to Smart Bomb to quickly stagger last Taxim
- Switch to Aggression to quickly take it out
Battle
CIE'TH : WINGED CIE'TH : Nelapsi
 LIGHTNING FARRON
 OERBA DE VANILLE
 SAZH KATZROY
 CIE'TH : WINGED CIE'TH : Nelapsi
MONSTERS : NELAPSI [2]
- Start with Decimation using Ruinga while Haste is being casted
- Switch to Aggression using Ruinga to quickly take them out
Battle
FERAL CREATURES : FLAN : Flan
 LIGHTNING FARRON
 OERBA DE VANILLE
 SAZH KATZROY
 FERAL CREATURES : FLAN : Flan
MONSTERS : FLANS [4]
- Switch to Aggression using Blitz/Ruinga to quickly take them all out
Battle
FERAL CREATURES : BEHEMOTHS : Behemoth King
 LIGHTNING FARRON
 OERBA DE VANILLE
 SAZH KATZROY
 FERAL CREATURES : BEHEMOTHS : Behemoth King
MONSTERS : BEHEMOTH KING [1]
- Try for Preemptive Strike
- Switch to Smart Bomb to quickly cast at least four debuffs and stagger
- Switch to Aggression to quickly take it out
Battle
FERAL CREATURES : SPOOKS : Rangda
 LIGHTNING FARRON
 OERBA DE VANILLE
 SAZH KATZROY
 FERAL CREATURES : SPOOKS : Rangda
MONSTERS : RANGDA [3]
- Switch to Aggression using Blitz/Ruinga to quickly take them all out
Battle
FERAL CREATURES : ARMADILLONS : Navidon
 LIGHTNING FARRON
 OERBA DE VANILLE
 SAZH KATZROY
 FERAL CREATURES : ARMADILLONS : Navidon
MONSTERS : NAVIDON [1]
- Start with Decimation using Blitz/Ruinga while Haste is being casted
- Switch to Smart Bomb to quickly stagger
- Switch to Aggression to quickly take it out
Battle
FERAL CREATURES : ARMADILLONS : Navidon, FERAL CREATURES : SPOOKS : Rangda
 LIGHTNING FARRON
 OERBA DE VANILLE
 SAZH KATZROY
 FERAL CREATURES : ARMADILLONS : Navidon
 FERAL CREATURES : SPOOKS : Rangda
MONSTERS : NAVIDON [1] | RANGDA {3]
- Start with Decimation using Blitz/Ruinga on Rangdas while Haste is being casted
- Switch to Aggression using Blitz/Ruinga to quickly take out Rangdas
- Switch to Smart Bomb to cast debuffs on Navidon and quickly stagger
- Switch to Aggression when staggered to quickly take it out
Battle
FERAL CREATURES : ARMADILLONS : Navidon, FERAL CREATURES : SPOOKS : Rangda
 LIGHTNING FARRON
 OERBA DE VANILLE
 SAZH KATZROY
 FERAL CREATURES : ARMADILLONS : Navidon
 FERAL CREATURES : SPOOKS : Rangda
MONSTERS : NAVIDONS [2] | RANGDAS {4}
- Start with Decimation using Blitz/Ruinga on Rangdas while Haste is being casted
- Switch to Aggression using Blitz/Ruinga to quickly take them all out
- Switch to Smart Bomb to quickly stagger Navidon
- Switch to Aggression to quickly take it out
- Repeat on other Navidon
- Use Diversity/Convalscence as needed
Battle
FERAL CREATURES : ARMADILLONS : Navidon
 LIGHTNING FARRON
 OERBA DE VANILLE
 SAZH KATZROY
 FERAL CREATURES : ARMADILLONS : Navidon
MONSTERS : NAVIDONS [2]
- Start with Decimation using Blitz/Ruinga
- Switch to Smart Bomb to quickly stagger
- Switch to Aggression to quickly take itout
- Repeat on other Navidon
- Use Diversity/Convalscence as needed
Battle
FERAL CREATURES : WYVERNS : Amphisbaena
 LIGHTNING FARRON
 OERBA DE VANILLE
 SAZH KATZROY
 FERAL CREATURES : WYVERNS : Amphisbaena
MONSTERS : AMPHISBAENA [1]
- Switch to Smart Bomb to quickly stagger
- Switch to Aggression to quickly take it out
Battle
FERAL CREATURES : GOBLINS : Goblin
 LIGHTNING FARRON
 OERBA DE VANILLE
 SAZH KATZROY
 FERAL CREATURES : GOBLINS : Goblin
MONSTERS : GOBLINS [5]
- Start with Decimation using Blitz/Ruinga while Haste is being casted
- Switch to Aggression using Blitz/Ruinga to quickly take them all out
Battle
FERAL CREATURES : BEASTS : Gorgonopsid
 LIGHTNING FARRON
 OERBA DE VANILLE
 SAZH KATZROY
 FERAL CREATURES : BEASTS : Gorgonopsid
MONSTERS : GORGONOPSIDS [5]
- Start with Aggression using Blitz/Ruinga to quickly take them all out
- Switch to Tri-Disaster to quickly stagger and take out last Gorgonopsid
Battle
FERAL CREATURES : BEHEMOTHS : Kaiser Behemoth
 LIGHTNING FARRON
 OERBA DE VANILLE
 SAZH KATZROY
 FERAL CREATURES : BEHEMOTHS : Kaiser Behemoth
MONSTERS : KAISER BEHEMOTH [1]
- Cast Libra at the start of the battle
- Start with Decimation while haste is being casted
- Switch to and Rotate between Smart Bomb & Tri-Disaster to stagger if possible
- Switch to Aggression to quickly take it out
- Use Diversity/Convalscence as needed
Battle
FERAL CREATURES : BEASTS : Megistotherian, FERAL CREATURES : BEASTS : Gorgonopsid
 LIGHTNING FARRON
 OERBA DE VANILLE
 SAZH KATZROY
 FERAL CREATURES : BEASTS : Megistotherian
 FERAL CREATURES : BEASTS : Gorgonopsid
MONSTERS : MEGISTOTHERIAN [1] | GORGONOPSIDS [4]
- Start with Aggression using Blitz/Ruinga to quickly take out Gorgonopsids
- Use Diversity/Convalscence as needed
Battle
FERAL CREATURES : BEHEMOTHS : Behemoth King, FERAL CREATURES : BEASTS : Megistotherian
 LIGHTNING FARRON
 OERBA DE VANILLE
 SAZH KATZROY
 FERAL CREATURES : BEHEMOTHS : Behemoth King
 FERAL CREATURES : BEASTS : Megistotherian
MONSTERS : BEHEMOTH KING [1] | MEGISTOTHERIAN [1]
- Start with Decimation on Behemoth King while Haste is being casted
- Switch to Smart Bomb to cast at least three debuffs
- Switch to Aggression to quickly take out Behemoth King
- Switch to Smart Bomb to cast debuffs on Megistotherian
- Switch to Aggression to quickly take it out
- Use Diversity/Convalscence as needed
Battle
PULSE AUTOMATA : COMBAT ENGINEERS : Ambling Bellows
 LIGHTNING FARRON
 OERBA DE VANILLE
 SAZH KATZROY
 PULSE AUTOMATA : COMBAT ENGINEERS : Ambling Bellows
MONSTERS : AMBLING BELLOWS [1]
- Try for Preemptive Strike
- Cast Libra at the start of battle
- Start with Decimation while Haste is being casted
- Switch to Smart Bomb to cast debuffs
- Switch to Aggression if staggered
- Use Diversity/Convalscence as needed
Battle
PULSE AUTOMATA : PULSEWORK SOLDIERS : Pulsework Gladiator
 LIGHTNING FARRON
 OERBA DE VANILLE
 SAZH KATZROY
 PULSE AUTOMATA : PULSEWORK SOLDIERS : Pulsework Gladiator
MONSTERS : PULSEWORK GLADIATOR [3]
- Try for preemptive strike
- Start with Decimation until Haste is casted
- Switch to Aggression to quickly take them all out
Battle
PULSE AUTOMATA : PULSEWORK SOLDIERS : Pulsework Gladiator, FERAL CREATURES : BEASTS : Managarmr
 LIGHTNING FARRON
 OERBA DE VANILLE
 SAZH KATZROY
 PULSE AUTOMATA : PULSEWORK SOLDIERS : Pulsework Gladiator
 FERAL CREATURES : BEASTS : Managarmr
MONSTERS : PULSEWORK GLADIATOR [2[ | MANAGARMR [1]
- Try for Preemptive Strike
- Start with Decimation on Pulsework Gladiators until Haste is casted
- Switch to Smart Bomb to quickly stagger Pulsework Gladiators
- Switch to Aggression when staggered to quickly take it out
- Repeat as needed until both Pulsework Gladiators are quickly taken out
- Switch to Relentless Assault to quickly stagger Managarmr until staggered
- Switched to Aggression to quickly take it out
Battle
PULSE AUTOMATA : PULSEWORK SOLDIERS : Pulsework Gladiator
 LIGHTNING FARRON
 OERBA DE VANILLE
 SAZH KATZROY
 PULSE AUTOMATA : PULSEWORK SOLDIERS : Pulsework Gladiator
MONSTERS : PULSEWORK GLADIATORS [5]
- Try for Preemptive Strike
- Start with Decimation while Haste is being casted
- Switch to Relentless Assault using Blitz & Ruinga to quickly stagger
- Switch to Aggression using Blitz & Ruingato quickly take them out when staggered
- Repeat as needed
Battle
PULSE AUTOMATA : PULSEWORK SOLDIERS : Pulsework Gladiator
 LIGHTNING FARRON
 OERBA DE VANILLE
 SAZH KATZROY
 PULSE AUTOMATA : PULSEWORK SOLDIERS : Pulsework Gladiator
MONSTERS : PULSEWORK GLADIATORS [2]
- Try for Preemptive Strike
- Start with Relentless Assault to quickly stagger
- Switch to Aggression to quickly take it out
- Repeat as needed
Battle
FERAL CREATURES : DAEMONS : Yaksha
 LIGHTNING FARRON
 OERBA DE VANILLE
 SAZH KATZROY
 FERAL CREATURES : DAEMONS : Yaksha
MONSTERS : YAKSHA [2]
- Try for Preemptive Strike
- Cast Libra at start of battle
- Stay in Decimation for the entire fight using Blitz to quickly take them both out
- Use auto-attack on last Yaksha
Battle
FERAL CREATURES : DAEMONS : Yakshini
 LIGHTNING FARRON
 OERBA DE VANILLE
 SAZH KATZROY
 FERAL CREATURES : DAEMONS : Yakshini
MONSTERS : YAKSHINI [2]
- Try for Preemptive Strike
- Cast Libra at start of battle
- Stay in Decimation for the entire fight using Blitz to quickly take them out
- Use auto-attacks to quickly finish off the last Yakshini
Battle
FERAL CREATURES : DAEMONS : Yakshini, FERAL CREATURES : DAEMONS : Yaksha
 LIGHTNING FARRON
 OERBA DE VANILLE
 SAZH KATZROY
 FERAL CREATURES : DAEMONS : Yakshini
 FERAL CREATURES : DAEMONS : Yaksha
MONSTERS : YAKSHINI [1] | YAKSHA [2]
- Try for Preemptive Strike
- Stay in Decimation for the entire fight using Blitz to quickly take out Yashini first
- Use Blitz on the remaining two Yashas
- Use auto-attack on the last Yaksha
Battle
CIE'TH : WINGED CIE'TH : Varcolaci
 LIGHTNING FARRON
 OERBA DE VANILLE
 SAZH KATZROY
 CIE'TH : WINGED CIE'TH : Varcolaci
MONSTERS : VARCOLACI [2]
- Use Deceptisol before battle and head to the end of the room by the treasure chest
- Cast Libra before using Ruinga to quickly take them out
Battle
CIE'TH : SHAMBLING CIE'TH : Vampire
 LIGHTNING FARRON
 OERBA DE VANILLE
 SAZH KATZROY
 CIE'TH : SHAMBLING CIE'TH : Vampire
MONSTERS : VAMPIRE [1]
- Try for Preemptive Strike
- Cast Libra at start of battle
- Use auto-attack to quickly take it out
Battle
CIE'TH : WINGED CIE'TH : Varcolaci
 LIGHTNING FARRON
 OERBA DE VANILLE
 SAZH KATZROY
 CIE'TH : WINGED CIE'TH : Varcolaci
MONSTERS : VARCOLACI [1]
- Use Ruinga for the entire fight to quickly take it out
Battle
CIE'TH : WINGED CIE'TH : Varcolaci
 LIGHTNING FARRON
 OERBA DE VANILLE
 SAZH KATZROY
 CIE'TH : WINGED CIE'TH : Varcolaci
MONSTERS : VARCOLACI [2]
- Use Ruinga until Haste is casted
- Switch to Aggression using Ruinga for hte entire fight to quickly take them out
Battle
CIE'TH : WINGED CIE'TH : Chonchon
 LIGHTNING FARRON
 OERBA DE VANILLE
 SAZH KATZROY
 CIE'TH : WINGED CIE'TH : Chonchon
MONSTERS : CHONCHON [5-6]
- Cast Libra at start of battle
- Use Ruinga to quickly take them all out
Battle
CIE'TH : WINGED CIE'TH : Varcolaci
 LIGHTNING FARRON
 OERBA DE VANILLE
 SAZH KATZROY
 CIE'TH : WINGED CIE'TH : Varcolaci
MONSTERS : VARCOLACI [2]
- Switch to Aggression using Ruinga to quickly take them out
Battle
PULSE AUTOMATA : PULSEWORK SOLDIERS : Pulsework Gladiator
 LIGHTNING FARRON
 OERBA DE VANILLE
 SAZH KATZROY
 PULSE AUTOMATA : PULSEWORK SOLDIERS : Pulsework Gladiator
MONSTERS : PULSEWORK GLADIATORS [5]
- Try for Preemptive Strike
- Start with Decimation while Haste is being casted
- Switch to Relentless Assault to quickly stagger
- Switch to Aggression to quickly take them out when staggered
- Repeat as needed
Battle
FERAL CREATURES : DAEMONS : Yakshini, FERAL CREATURES : DAEMONS : Yaksha
 LIGHTNING FARRON
 OERBA DE VANILLE
 SAZH KATZROY
 FERAL CREATURES : DAEMONS : Yakshini
 FERAL CREATURES : DAEMONS : Yaksha
MONSTERS : YAKSHINI [1] | YAKSHA [2]
- Try for Preemptive Strike
- Stay in Decimation for the entire fight using Ruinga to quickly take them all out
- Use auto-attack on last Yaksha
Battle
FERAL CREATURES : DAEMONS : Yakshini
 LIGHTNING FARRON
 OERBA DE VANILLE
 SAZH KATZROY
 FERAL CREATURES : DAEMONS : Yakshini
MONSTERS : YAKSHINI [2]
- Try for Preemptive Strike
- Stay in Decimation for the entire fight using Ruinga to quickly take them out
Battle
FERAL CREATURES : DAEMONS : Yaksha
 LIGHTNING FARRON
 OERBA DE VANILLE
 SAZH KATZROY
 FERAL CREATURES : DAEMONS : Yaksha
MONSTERS : YAKSHA [2]
- Try for Preemptive Strike
- Stay in Decimation for the entie fight using Ruinga to quickly take them both out
Battle
CIE'TH : SHAMBLING CIE'TH : Vampire
 LIGHTNING FARRON
 OERBA DE VANILLE
 SAZH KATZROY
 CIE'TH : SHAMBLING CIE'TH : Vampire
MONSTERS : VAMPIRE [1]
- Try for Preemptive Strike
- Start with Decimation using auto-attack while Haste is being casted
- Switch to Smart Bomb to cast debuff and stagger
- Switch to Aggression to quickly finish it off when staggered
Battle
CIE'TH : WINGED CIE'TH : Varcolaci
 LIGHTNING FARRON
 OERBA DE VANILLE
 SAZH KATZROY
 CIE'TH : WINGED CIE'TH : Varcolaci
MONSTERS : VARCOLACI [1]
- Stay in Decimation for the entire fight using auto-attack to quickly take it out
Battle
CIE'TH : WINGED CIE'TH : Varcolaci
 LIGHTNING FARRON
 OERBA DE VANILLE
 SAZH KATZROY
 CIE'TH : WINGED CIE'TH : Varcolaci
MONSTERS : VARCOLACI [2]
- Stay in Decimation using Ruinga for the entire fight
Battle
CIE'TH : SHAMBLING CIE'TH : Vampire, CIE'TH : WINGED CIE'TH : Chonchon
 LIGHTNING FARRON
 OERBA DE VANILLE
 SAZH KATZROY
 CIE'TH : SHAMBLING CIE'TH : Vampire
 CIE'TH : WINGED CIE'TH : Chonchon
MONSTERS : VAMPIRE [1] | CHONCHON [3-4]
- Start with Decimation using Ruinga to quickly take out the Chonchons while Haste is being casted
- Switch to Smart Bomb to cast at least 2-3 debuffs on Vampire
- Switch to Relentless Assault to stagger
- Switch to Aggression to quickly take it out
Battle
CIE'TH : SHAMBLING CIE'TH : Vampire
 LIGHTNING FARRON
 OERBA DE VANILLE
 SAZH KATZROY
 CIE'TH : SHAMBLING CIE'TH : Vampire
MONSTERS : VAMPIRES [3]
- Try for Preemptive Strike
- Start with Decimation using Ruinga to quickly stagger while Haste is being casted
- Switch to Aggression using auto-attack to quickly take out the staggered Vampires
- Switch to Smart Bomb to cast at least 2-3 debuffs on the last Vampire
- Switch to Aggression when staggered to quickly take out last Vampire
Boss
FERAL CREATURES : SPOOKS : Verdelet
 LIGHTNING FARRON
 OERBA DE VANILLE
 SAZH KATZROY
 FERAL CREATURES : SPOOKS : Verdelet
MONSTER BOSS : VERDELET [4] | ADORA [1]
- Start with Aggression spamming use of Ruinga to quickly take them all out
Battle
CIE'TH : THE UNDYING : Bituitus
 LIGHTNING FARRON
 OERBA DE VANILLE
 SAZH KATZROY
 CIE'TH : THE UNDYING : Bituitus
MONSTERS : BITUITUS [1]
- Start with Decimation using Ruinga while Haste is being casted
- Switch to Smart Bomb to quickly stagger
- Switch to Aggression to quickly take it out
- Use Diversity as needed
Battle
FERAL CREATURES : SAHAGIN : Sahagin
 LIGHTNING FARRON
 OERBA DE VANILLE
 SAZH KATZROY
 FERAL CREATURES : SAHAGIN : Sahagin
MONSTERS : SAHAGINS [2 - 6]
- Start with Decimation using Blitz/Ruinga while Haste is being casted
- Switch to Aggression using Blitz/Ruinga to quickly take them out
Battle
PULSE AUTOMATA : PULSEWORK SOLDIERS : Pulsework Champion , CIE'TH : UNUSUAL CIE'TH : Seeker
 LIGHTNING FARRON
 OERBA DE VANILLE
 SAZH KATZROY
 PULSE AUTOMATA : PULSEWORK SOLDIERS : Pulsework Champion
 CIE'TH : UNUSUAL CIE'TH : Seeker
BOSS : PULSEWORK CHAMPION [1] | SEEKERS [3]
- Use Decepitsol before fight
- Start with Decimation using Ruinga/Blitz on Pulsework Champion to quickly stagger and take out Seekers
- Switch to Aggression to quickly take out Pulsework Champion
Battle
FERAL CREATURES : GOBLINS : Borgbear Hero, FERAL CREATURES : GOBLINS : Borgbear, FERAL CREATURES : GOBLINS : Goblin Chieftain , FERAL CREATURES : GOBLINS : Goblin, FERAL CREATURES : GOBLINS : Munchkin, FERAL CREATURES : GOBLINS : Munchkin Maestro
 LIGHTNING FARRON
 OERBA DE VANILLE
 SAZH KATZROY
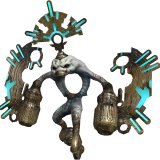 FERAL CREATURES : GOBLINS : Borgbear Hero
 FERAL CREATURES : GOBLINS : Borgbear
 FERAL CREATURES : GOBLINS : Goblin Chieftain
 FERAL CREATURES : GOBLINS : Goblin
 FERAL CREATURES : GOBLINS : Munchkin
 FERAL CREATURES : GOBLINS : Munchkin Maestro
MONSTER BOSSES : BORGBEAR HERO [1] | BORGBEAR [1] | GOBLIN CHIEFTAIN [1] | GOBLIN [1] | MUNCHKIN MAESTRO [1] | MUNCHKIN [1]
- Use Deceptisol before battle
- Start with Decimation using Blitz/Ruinga to quickly take out Borgbear Hero
- Switch back to Relentless Assault using Blitz/Ruinga to quickly stagger Borgbear
- Switch to Aggression to quickly take it out
- Repeat as necessary on the remaining Chieftain Goblin, Munchkin Maestro, Goblin and Munchkin
- Use Convalescence only when absolutely necessary
Battle
FERAL CREATURES : FLAN : Corrosive Custard, FERAL CREATURES : FLAN : Hybrid Flora, FERAL CREATURES : FLAN : Monstrous Flan
 FERAL CREATURES : FLAN : Corrosive Custard
 FERAL CREATURES : FLAN : Hybrid Flora
 FERAL CREATURES : FLAN : Monstrous Flan
MONSTER BOSSES : CORROSIVE CUSTARD ]1] | HYBRID FLORA [1] | MONSTROUS FLAN [1]
- Use Deceptisol before battle
- Cast Libra on Corrosive Custard and Monstrous Flan at start of battle
- Use Blitz/Ruinga to quickly stagger Corrosive Custard while Haste is being casted
- Switch to Aggression to quickly take it out
- Switch to Tireless Charge if needed to keep health topped up while taking out Corrosive Custard
- Switch to Relentless Assault to quickly stagger and take out Hybrid Flora
- Switch to Smart Bomb to quickly take out Monstrous Flan and cast debuffs
- Use Convalescence as only when absolutely needed
Eidolon
OTHERS : EIDOLONS : Alexander
 LIGHTNING FARRON
 HOPE ESTHEIM
 MYSTERIOUS WOMAN : OERBA YUN FANG
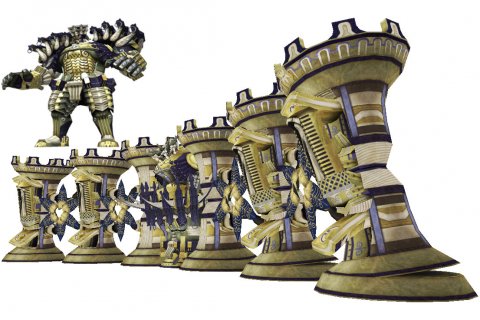 OTHERS : EIDOLONS : Alexander
MONSTERS : ALEXANDER
- Start with Relentless Assault
- Switch to Synergist to cast debuffs on all allies
- Use Combat Clinic as needed
NOTES :
- Yields to those who amass chain bonuses
- Yields to those who heal the wounded
- Yields to those who strengthen their allies
Boss
CIE'TH : THE UNDYING : Geiseric
 LIGHTNING FARRON
 OERBA DE VANILLE
 SAZH KATZROY
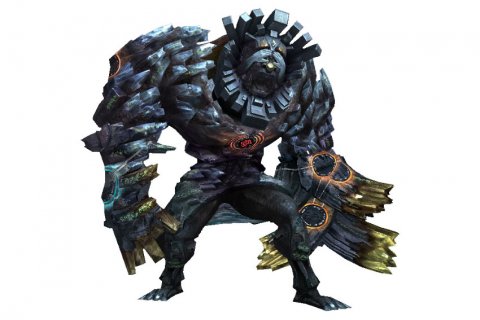 CIE'TH : THE UNDYING : Geiseric
- Cast Libra at the start of battle
- Start with Decimation using Blitz/Ruinga while Haste is being casted
- Switch to Smart Bomb to cast at least three debuffs and quickly stagger
- Switch to Aggression to quickly take it out
- Use Diversity/Convalescence as needed
----------------------------------------------------------------------------------------------------------------------------------------------------------------------------------------------------------------------------------------------------------------------
NOTES :
- Can be attacked in multiple locations
- Susceptible to Deshell
- Delivers devastating physical attacks
- Susceptible to Slow
Boss
PULSE AUTOMATA : ARMAMENTS : Juggernaut
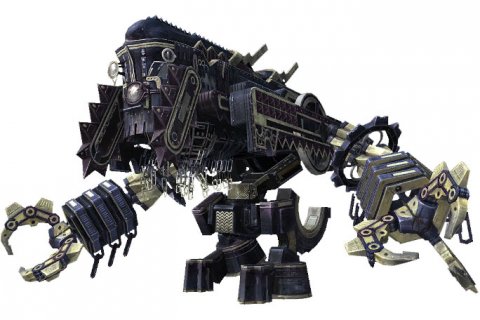 PULSE AUTOMATA : ARMAMENTS : Juggernaut
MONSTER : JUGGERNAUT [1]
- Cast Libra at start of battle
- Start with Decimation to cast Haste
- Switch to Smart Bomb to cast at least three debuffs and quickly stagger
- Switch to Aggression to quickly take it out
- Use Convalescence as needed
----------------------------------------------------------------------------------------------------------------------------------------------------------------------------------------------------------------------------------------------------------------------
NOTES :
- High damage-dealing potential
- Employs powerful fire-based attacks
- Delivers devastating physical attacks
- Capable of removing status ailments
Boss
OTHERS : EIDOLONS : Hecatoncheir
 OERBA DE VANILLE
 MYSTERIOUS WOMAN : OERBA YUN FANG
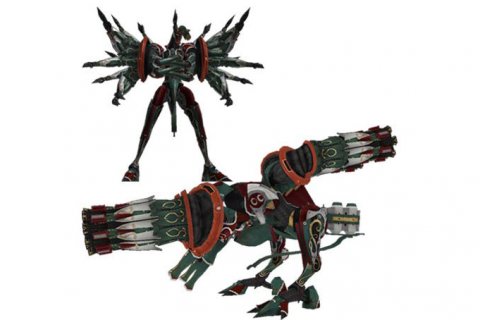 OTHERS : EIDOLONS : Hecatoncheir
- Yields to those who amass chain bonuses
- Yields to those who heal the wounded
- Yields to those who weaken and debilitate their enemies
Boss
FERAL CREATURES : FLAN : Gelatitan
 LIGHTNING FARRON
 OERBA DE VANILLE
 SAZH KATZROY
 FERAL CREATURES : FLAN : Gelatitan
MONSTER : GELATITAN [1]
- Try for Preemptive Strike
- Cast Libra at start of battle
- Start with Decimation to cast Haste
- Switch to Smart Bomb to cast at least three debuffs
- Switch to Relentless Assault to quickly stagger
- Switch to Aggression to quickly take it out
- Use Diversity as needed
NOTES :
- Employs powerful water-based attacks
- Delivers devastating physical attacks
- Vulnerable to lightning damage
- Capable of inflicting Imperil
Boss
PULSE AUTOMATA : COMBAT ENGINEERS : Ambling Bellows/Cryotos
 LIGHTNING FARRON
 OERBA DE VANILLE
 SAZH KATZROY
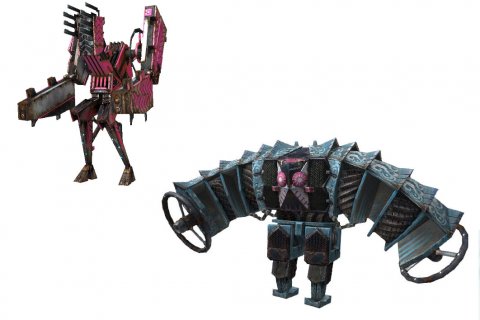 PULSE AUTOMATA : COMBAT ENGINEERS : Ambling Bellows/Cryotos
MONSTERS : AMBLING BELLOWS [1] | CRYPTOS [2]
- Try for Preemptive Strike on Cryptos
- Cast Libra on Cryptos at start of battle
- Start with Decimation on Ambling Bellows while Haste is being casted
- Switch to Smart Bomb while Ambling Bellows is staggered to quickly cast at least 3 debuffs
- Switch to Aggression to quickly take out Ambling Bellows
- Switch to Smart Bomb on Cryptos until at least 3 debuffs is casted
- Switch to Aggression to quickly take it out.
Boss
FERAL CREATURES : ARMADILLONS : Gurangatch
 LIGHTNING FARRON
 OERBA DE VANILLE
 SAZH KATZROY
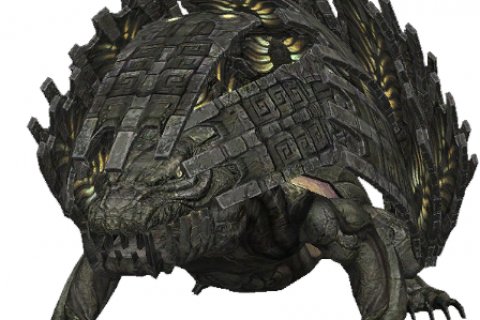 FERAL CREATURES : ARMADILLONS : Gurangatch
MONSTER : GURANGATCH
- Try for Preemptive Strike
- Cast Libra at start of battle
- Start with Decimation while Haste is being casted
- Switch to Smart Bomb to cast at least 3 debuffs
- Switch to Relentless Assault to quickly stagger
- Switch to Aggression to quickly take it out
----------------------------------------------------------------------------------------------------------------------------------------------------------------------------------------------------------------------------------------------------------------------
NOTES :
- Physical and magic resistance low when staggered
- Employs powerful lightning-based attacks
- Delivers devastating phyiscal attacks
- Chain bonus accumlates slowly
Boss
FERAL CREATURES : STALKERS : Mushussu
 LIGHTNING FARRON
 OERBA DE VANILLE
 SAZH KATZROY
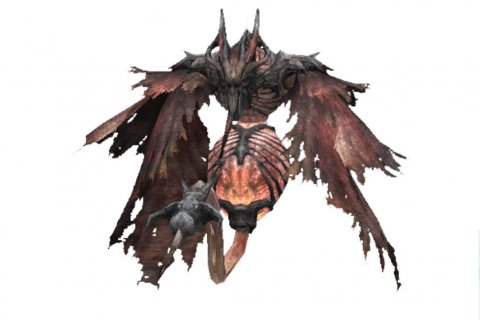 FERAL CREATURES : STALKERS : Mushussu
MONSTERS : MUSHUSSU [1] | YAKSHINI [2]
- Try for Preemptive Strike
- Cast Libra at start of battle on Mushussu
- Start with Decimation using Ruinga on both Yakshini to quickly take them out
- Switch to Relentless Assault to quickly stagger Mushussu
- Switch to Aggression to quickly take it out
----------------------------------------------------------------------------------------------------------------------------------------------------------------------------------------------------------------------------------------------------------------------
NOTES :
- Elemental damage is ineffectual
-
-
Boss
CIE'TH : UNUSUAL CIE'TH : Vetala
 LIGHTNING FARRON
 OERBA DE VANILLE
 SAZH KATZROY
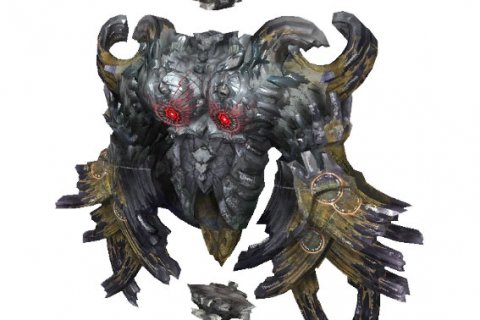 CIE'TH : UNUSUAL CIE'TH : Vetala
MONSTERS : VETALA
- Start with Decimation while Haste is being casted
- Switch to Smart Bomb to cast at least 3 debuffs
- Switch to Aggression when staggered
---------------------------------------------------------------------------------------------------------------------------------------------------------------------------------------------------------------------------------------------------------------
NOTES :
- Executes powerful magic attacks
- Vulnerable to physical attacks
- Capable of inflicting Poison
Boss
CIE'TH : WINGED CIE'TH : Penanggalan
 LIGHTNING FARRON
 OERBA DE VANILLE
 SAZH KATZROY
 CIE'TH : WINGED CIE'TH : Penanggalan
MONSTERS : PENANGGALAN [1] | CHRONCHRON [6]
- Cast Libra at start of battle on Penanggalan
- Start with Decimation using Ruinga until Haste is casted
- Switch to Aggression using Ruinga for the entire fight to quickly finish it off
------------------------------------------------------------------------------------------------------------------------------------------------------------------------------------------------------------------------------------------------------------------
NOTES :
- Executes powerful magic attacks
- Capable of inflicting Poison
- Capable of inflicting Deprotect
Boss
CIE'TH : WINGED CIE'TH : Mithridates
 LIGHTNING FARRON
 OERBA DE VANILLE
 SAZH KATZROY
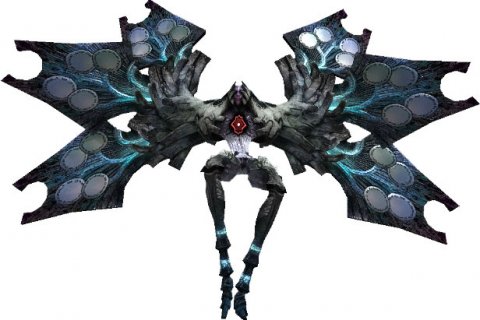 CIE'TH : WINGED CIE'TH : Mithridates
BOSS : MITHRIDATES
- Start with Convalescence to keep health up while casting at least two buffs
- Switch to Relentless Assault to quickly stagger
- Switch to Aggression when Staggered
- Use Convalescence to keep health topped up and add more buffs as needed
NOTES :
- Employs powerful lightning-based attacks
- Capable of inflicting poison
- Frequently evades attacks
- Executes powerful magic attacks
Boss
OTHERS : FAL'CIE : Barthandelus
 LIGHTNING FARRON
 OERBA DE VANILLE
 SAZH KATZROY
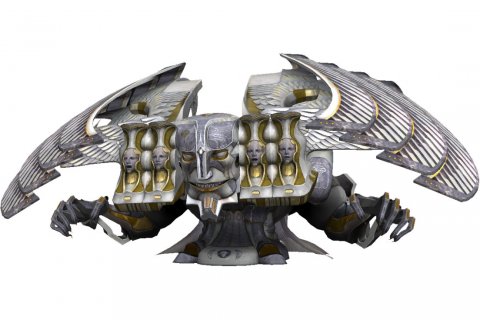 OTHERS : FAL'CIE : Barthandelus
- Cast Aegisol & Fortisol before battle
- Cast Libra at start of battle
- Use up all CP to be stronger
- Start with Relentless Assault
- Switch to Tri-Disaster to stagger
- Switch to Cerberus while staggered
- Repeat as necessary
- Use Tireless Charge/Convalescence as needed
NOTES :
- Capable of inflicting Poison
- Capable of inflicting Daze
- Capable of inflicting Curse
Boss
PULSE AUTOMATA : ARMAMENTS : Juggernaut
 LIGHTNING FARRON
 OERBA DE VANILLE
 SAZH KATZROY
 PULSE AUTOMATA : ARMAMENTS : Juggernaut
BOSS : JUGGERNAUT [1]
- Use Deceptisol before fight
- Switch to Smart Bomb at start of fight to cast at least 4 debuffs
- Switch to Aggression to quickly take it out
- Switch to Smart Bomb if necessary after stagger bar runs out
Boss
CIE'TH : THE UNDYING : Syphax
 LIGHTNING FARRON
 OERBA DE VANILLE
 SAZH KATZROY
 CIE'TH : THE UNDYING : Syphax
BOSS : Syphax [1]
- Start with Decimation using Ruinga/Blitz until Haste is casted
- Switch to Relentless Assault using Ruinga/Blitz to quickly stagger
- Use Convalescence as needed
- Repeat as necessary until it's taken out
NOTES :
- Executes powerful magic attacks
- Capable of inflicting Debrave
- Capable of inflicting Defaith
Boss
CIE'TH : UNDYING : Numidia
 LIGHTNING FARRON
 OERBA DE VANILLE
 SAZH KATZROY
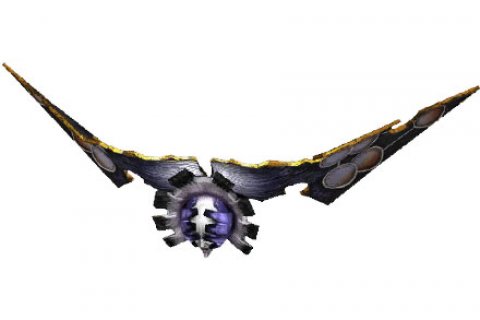 CIE'TH : UNDYING : Numidia
BOSS : NUMIDIA [6]
- Start with Decimation while Haste is being casted using Ruinga/Blitz
- Switch to Relentless Assault using Ruinga/Blitz to quickly take them all out
- Use Convalescence as needed
- Repeat as necessary
NOTES :
- Attacks quickly and relentlessly
Boss
FERAL CREATURES : BEASTS : Amam
 LIGHTNING FARRON
 OERBA DE VANILLE
 SAZH KATZROY
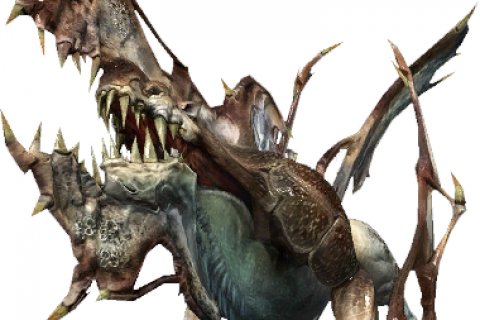 FERAL CREATURES : BEASTS : Amam
BOSS : AMAM [1]
- Cast Libra at start of battle
- Start with Decimation while Haste is being casted
- Switch to Relentless Assault to quickly stagger
- Switch to Aggression when staggered
NOTES :
- Capable of inflicting Curse
- Employs powerful lightning-based attacks
- Delivers devastating physical attacks
- Attacks quickly and relentlessly
Boss
FERAL CREATURES : ORETOISES : Adamanchelid
 LIGHTNING FARRON
 OERBA DE VANILLE
 SAZH KATZROY
 FERAL CREATURES : ORETOISES : Adamanchelid
BOSS : ADAMANCHELID [1]
- Use Deceptisol before fight
- Attack from behind and cast Libra
- Start with Decimation while Haste is being casted
- Switch to Smart Bomb to cast at least four debuffs
- Switch to Convalescence to keep health topped up
- Switch back to Smart Bomb to stagger
- Switch to Aggression to quickly take it out
- Switch to Tireless Charge as needed
NOTES :
- Never allows itself to be caught by Preemptive Strikes
- Delivers devastating phyiscal attacks
- Executes powerful magic attacks
- ???
Boss
FERAL CREATURES : TONBERRIES : Tonberry
 LIGHTNING FARRON
 OERBA DE VANILLE
 SAZH KATZROY
 FERAL CREATURES : TONBERRIES : Tonberry
MONSTER BOSS : TONBERRY [1-3]
- Cast Libra at start of battle
- Switch to Smart Bomb to cast at least four debuffs
- Switch to Relentless Assault to try and stagger
- Use Convalescence as needed
NOTES :
- Grudge grows proggressively deeper and more severe
- Delivers devastating physical attacks
- Executes powerful magic attacks
- ???
Boss
FERAL CREATURES : ARMADILLONS : Gurangatch
 LIGHTNING FARRON
 OERBA DE VANILLE
 SAZH KATZROY
 FERAL CREATURES : ARMADILLONS : Gurangatch
MONSTER BOSS : GURANGATCH [1]
- Cast Deceptisol before fight
- Start with Decimation while Haste is being casted
-Switch to Smart Bomb until staggered
- Switch to Aggression to quickly take it out
Boss
FERAL CREATURES : BEASTS : Amam
 LIGHTNING FARRON
 OERBA DE VANILLE
 SAZH KATZROY
 FERAL CREATURES : BEASTS : Amam
MONSTER BOSS : AMAM [2]
- Cast Libra at start of battle
- Start with Decimation using Blitz/Ruinga while Haste is being casted
- Switch to Relentless Assault using Blitz/Ruinga to stagger
- Use Convalescence as needed to keep health topped up with more buffs
- Switch to Aggression when staggered to quickly take it out using Blitz/Ruinga
- Use normal attacks on last Amam during Relentless Assaults and Aggression
Boss
FERAL CREATURES : NUDIBRANCHS : Rafflesia
 LIGHTNING FARRON
 OERBA DE VANILLE
 SAZH KATZROY
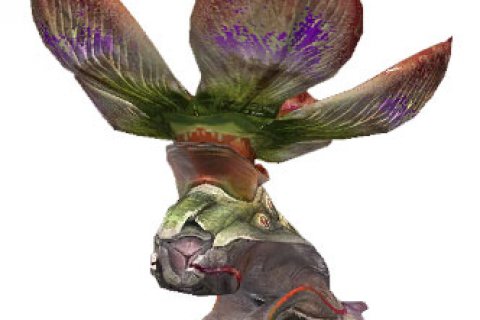 FERAL CREATURES : NUDIBRANCHS : Rafflesia
MONSTER BOSS : RAFFLESIA [6]
- Cast Libra at start of battle
- Try for Preemptive Strike
- Start with Decimation using Blitz/Ruinga to quickly stagger
- Switch to Aggression using Blitz/Ruinga to quickly take them all out
- Use Tireless Charge as needed
NOTES :
- Susceptible to Fog
- Susceptible to Slow
- Executes powerful magic attacks
- Vulnerable to fire damage
Boss
FERAL CREATURES : OCHU : Ochu
 LIGHTNING FARRON
 OERBA DE VANILLE
 SAZH KATZROY
 FERAL CREATURES : OCHU : Ochu
MONSTER BOSS : OCHU [1] | MICROCHU [2-6]
- Cast Fortisol and Aegisol before battle
- Cast Libra on Ochu at start of battle
- Start with Relentless Assault to quickly take out Ochu
- Switch to Convalescence to keep health topped up only when absolutely necessary
- Switch to Aggression using Blitz/Ruinga to quickly take out remaining Microchus
Boss
FERAL CREATURES : SPOOKS : Verdelet
 LIGHTNING FARRON
 OERBA DE VANILLE
 SAZH KATZROY
 FERAL CREATURES : SPOOKS : Verdelet
MONSTER BOSS : VERDELET [2]
- Try for preemptive strike
- Start with Relentless Assault using Blitz/Ruinga to quickly take them out
Boss
FERAL CREATURES : GOBLINS : Borgbear Hero
 LIGHTNING FARRON
 OERBA DE VANILLE
 SAZH KATZROY
 FERAL CREATURES : GOBLINS : Borgbear Hero
MONSTER BOSS : Borgbear Hero [1] | Borgbear [4]
- Cast Libra on Borgbear Hero at start of battle
- Start with Decimation to cast Haste using Blitz/Ruinga to quickly stagger Borgbears
- Switch to Aggression to quickly take out the staggered Borgbears
- Switch to back to Decimation to cast at least one more buffs to party members using Blitz/Ruinga to continue staggering the Borgbears
- Switch to Aggression to quickly take out staggered Borgbears
- Switch to Relentless Assault using Blitz/Ruinga to quickly stagger the remaining Borgbears
- Switch to Aggression to quickly take it out
- Repeat as necessary on the last standing Boss : Borgbear Hero
- Use Convalescence only when absolutely needed to keep health topped up and cast buffs
NOTES :
- Delivers devastating physical attacks
- Susceptible to Curse and effects of Vigilance
- Susceptible to Fog
- Vulnerable to fire damage
Boss
ANNIHILATORS : Anavatapta Warmech
 LIGHTNING FARRON
 SNOW VILLIERS
 OERBA DE VANILLE
 ANNIHILATORS : Anavatapta Warmech
NOTES :
- Vulnerable to lightning damage
- Capable of temporary invulnerability
Chapter 12 - CHAPTER TWELVE : THE EVENT CHAPTERS, THE THIRTEEN DAYS, FFXIII INFOS, BATTLES, BOSS FIGHTS
Boss
MILITARIZED UNITS : ANNIHILATORS : The Proudclad
 LIGHTNING FARRON
 OERBA DE VANILLE
 SAZH KATZROY
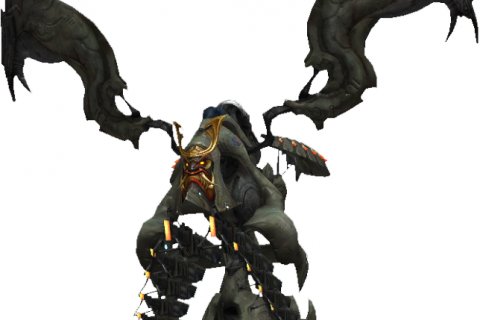 MILITARIZED UNITS : ANNIHILATORS : The Proudclad
MONSTER BOSS : THE PROUDCLAD [1]
- Cast Libra at start of battle
- Start with Decimation while Haste is being casted
- Switch to Relentless Assault to quickly stagger
- Switch to Cerberus to quickly take it out
- Repeat as necessary
- Use Convalescence only when ABSOLUTELY necessary to keep health topped up
NOTES :
- Delivers devastating physical attacks
- Immune to all status ailments
- Can alter own form
Chapter 13 - CHAPTER THIRTEEN : THE EVENT CHAPTERS, THE THIRTEEN DAYS, FFXIII INFOS, BATTLES, BOSS FIGHTS
Battle
CIE'TH : SHAMBLING CIE'TH : Sacrifice
 LIGHTNING FARRON
 OERBA DE VANILLE
 SAZH KATZROY
 CIE'TH : SHAMBLING CIE'TH : Sacrifice
MONSTERS : SACRIFICE [3-4]
- try for preemptive strike
- Switch to Cerberus when staggered
- Switch to Smart Bomb to quickly cast debuffs and stagger
- repeat as necessary
- use Convalescence when health is low
Battle
MILITARIZED UNITS : ARMATURES : Megrim Thresher, CIE'TH : SHAMBLING CIE'TH : Sacrifice
 LIGHTNING FARRON
 OERBA DE VANILLE
 SAZH KATZROY
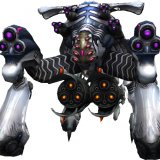 MILITARIZED UNITS : ARMATURES : Megrim Thresher
 CIE'TH : SHAMBLING CIE'TH : Sacrifice
MONSTERS : MEGRIM THRESHER [1] | SACRIFICE [2]
- Use Deceptisol before fight
- Switch to Smart Bomb to quickly cast debuffs while Sacrifice is staggered
- Switch to Cerberus to quickly finish it off
- Switch back to Smart Bomb to quickly cast debuffs on other Sacrifice and stagger
- Switch to Cerberus to quickly finish it off
- Repeat as necessary on Megrim Thresher
- Use Convalescence as needed to keep health topped up
Battle
MILITARIZED UNITS : ARMATURES : Megrim Thresher, SOLDIERS : PSICOM ELITES : Sanctum Templar
 LIGHTNING FARRON
 OERBA DE VANILLE
 SAZH KATZROY
 MILITARIZED UNITS : ARMATURES : Megrim Thresher
 SOLDIERS : PSICOM ELITES : Sanctum Templar
MONSTER BOSS : MEGRIM THRESHER [1] | SANCTUM TEMPLAR [1]
- Cast Deceptisol before battle
- Start with Decimation while Haste is being casted
- Switch to Smart Bomb to quickly cast debuffs on Sanctum Templar
- Switch to Cerberus to quickly try and take it out
- Switch to Smart Bomb to quickly stagger and cast more debuffs on Sanctum Templar
- Switch to Cerberus to quickly finish it off
- Repeat as necessary on Megrim Thresher
- Use Convalescence to keep health topped up
Boss
FERAL CREATURES : WOODWRAITHS : Jabberwocky/Bandersnatch
 LIGHTNING FARRON
 OERBA DE VANILLE
 SAZH KATZROY
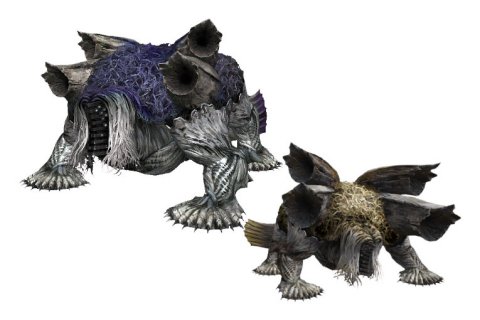 FERAL CREATURES : WOODWRAITHS : Jabberwocky/Bandersnatch
MONSTER BOSS : JABBERWOCKY [1] | BANDERSNATCH [1]
- Cast Libra on Jabberwocky at start of battle
- Start with Decimation while Haste is being casted
- Switch to Smart Bomb to cast debuffs and stagger
- Switch to Cerberus to quickly take it out
- Switch to Smart Bomb and cast Libra on Bandersnatch and cast debuffs and stagger
- Use Convalescence ONLY when absolutely necessary
NOTES : JABBERWOCKY
- Executes powerful magic attacks
- Susceptible to Deprotect
- Susceptible to Poison
NOTES : BANDERSNATCH
- Delivers devastating physical attacks
- Susceptible to Deshell
- Susceptible to Imperil
Boss
PULSE AUTOMATA : CENTAURIONS : Immortal
 LIGHTNING FARRON
 OERBA DE VANILLE
 SAZH KATZROY
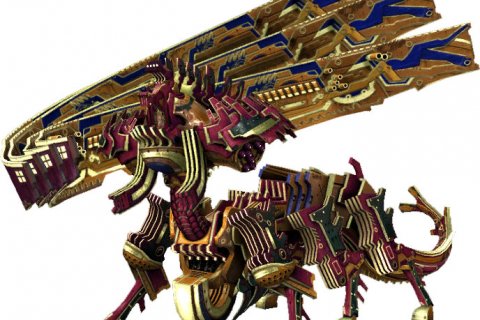 PULSE AUTOMATA : CENTAURIONS : Immortal
NOTES :
- High damage-dealing potential
- Employs powerful lightning-based attacks
- Delivers devastating physical attacks
Boss
CIE'TH : THE UNDYING : Wladislaus
 LIGHTNING FARRON
 OERBA DE VANILLE
 SAZH KATZROY
 CIE'TH : THE UNDYING : Wladislaus
MONSTER BOSS : WLADISLAUS [1]
- Cast Fortisol & Aegisol before battle
- Switch between Smart Bomb to cast debuffs and Relentless Assault to quickly take it out
- Use Convalescence to keep health topped up
NOTES :
- Delivers devastating physical attacks
- Executes powerful magic attacks
- Capable of inflicting Deprotect
- Capable of inflicting Deshell
Boss
MILITARIZED UNITS : ANNIHILATORS : Tiamat Eliminator
 LIGHTNING FARRON
 OERBA DE VANILLE
 SAZH KATZROY
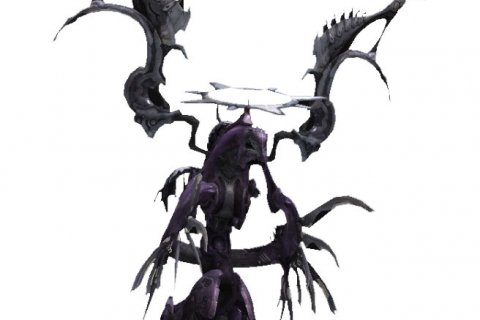 MILITARIZED UNITS : ANNIHILATORS : Tiamat Eliminator
NOTES :
- Employs powerful ice-based attacks
- Delivers devastating physical attacks
- Can alter own form
- Immune to all status ailments
Boss
OTHERS : FAL'CIE : Barthandelus
 LIGHTNING FARRON
 OERBA DE VANILLE
 SAZH KATZROY
 OTHERS : FAL'CIE : Barthandelus
MONSTER BOSS : BARTHANDELUS [1]
- Cast Fortisol & Aegisol before battle
- Cast Libra at start of battle
- Switch to Relentless Assault to start stagger bar
- Switch to Smart Bomb to cast debuff and stagger
- Switch to Cerberus when staggered
- Use Convalscence as needed
NOTES :
- Employs non-elemental attacks
Boss
OTHERS : FAL'CIE : Orphan
 LIGHTNING FARRON
 OERBA DE VANILLE
 SAZH KATZROY
 OTHERS : FAL'CIE : Orphan
MONSTER BOSS : ORPHAN [1]
- Cast Libra at start of battle
- Start with Decimation while Haste is being casted
- Switch to Relentless Assault to start stagger bar
- Switch to Smart Bomb to cast debuffs and stagger
- Use Convalescence as needed
NOTES :
- Hight damage-dealing potential
- Employs non-elemental attacks
- Capable of inflicting Fog
Boss
OTHERS : FAL'CIE : Orphan - version 2
 LIGHTNING FARRON
 OERBA DE VANILLE
 SAZH KATZROY
 OTHERS : FAL'CIE : Orphan - version 2
MONSTER BOSS : ORPHAN [1]
- Start with Decimation while Haste is being casted
- Switch to Relentless Assault to start stagger bar
- Switch to Smart Bomb to cast debuffs and stagger
- Switch to Cerberus when staggered
- Use Convalescence when needed
NOTES :
- Capable of inflicting Doom
- Cannot be damaged except when staggered
- Capable of inflicting Pain
- Employs physical and magical combination attacks
Boss
FERAL CREATURES : OCHU : Neochu
 LIGHTNING FARRON
 SNOW VILLIERS
 OERBA DE VANILLE
 FERAL CREATURES : OCHU : Neochu
MONSTER BOSS : NEOCHU [1]
- Cast Fortisol & Aegisol before battle
- Cast Libra at start of battle
- Cast DEATH debuff on Dirty Fighting
- Switch to Combat Clinic when health is low or debuffed
- Repeat as necessary until Neochu taken out
NOTES :
- Never allows itself to be caught by preemptive strikes
- Calls allies
- Employs powerful earth-based attacks
- Capable of inflicting Poison
Boss
FERAL CREATURES : WYVERNS : Zirnitra
 LIGHTNING FARRON
 OERBA DE VANILLE
 SAZH KATZROY
 FERAL CREATURES : WYVERNS : Zirnitra
MONSTER BOSS : ZIRNITRA [1]
- Cast Fortisol & Aegisol before battle
- Cast Libra at start of battle
- Start with Smart Bomb to cast debuffs and stagger
- Switch to Tri-Diaster to quickly stagger
- Switch to Cerberus when staggered
- Use Convalescence when health or debuffed as needed
NOTES :
- Delivers devastating physical attacks
- Capable of inflicting Poison
Boss
CIE'TH : UNUSUAL CIE'TH : Raktavija
 CIE'TH : UNUSUAL CIE'TH : Raktavija
MONSTER BOSS : RAKTAVIJA [1]
- Cast Fortisol & Aegisol before battle
- Cast Libra at start of battle
- Start with Smart Bomb to cast debuffs
- Switch to Tri-Disaster to quickly stagger
- Switch to Cerberus when Staggered
- Use Convalescence when health is low or debuffed
NOTES :
- Never allows itself to be caught by preemptive strikes
- Executes powerful magic attacks
- Chain bonus accumulates slowly
- Capable of inflicting Poison